II. Another possible cause could be a faulty heating element or a buildup of sediment in the tank, which can impede heat transfer and lower the water temperature.
III. Regular maintenance and inspection of the water heater can help prevent these issues and ensure it is functioning properly, providing reliable hot water when needed.
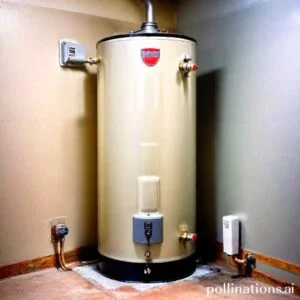
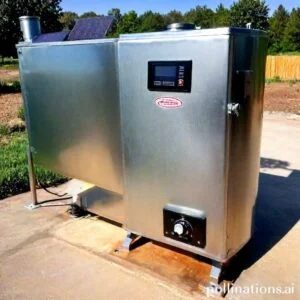
Having trouble with your water heater temperature not reaching the desired setpoint? We understand the frustration that comes with this issue.
Our goal is to help you troubleshoot and resolve this problem quickly and efficiently. Whether it’s a faulty thermostat, sediment buildup, or a heating element issue, our expert team is here to guide you through the troubleshooting process.
With our expertise and knowledge, we’ll have your water heater functioning at its optimal temperature in no time.
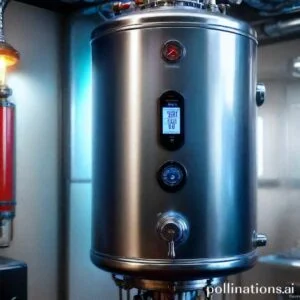
Checking the Thermostat
In regard to maintaining a comfortable indoor temperature, the thermostat plays a crucial role. In this section, we will provide a step-by-step guide to checking the thermostat, adjusting it to the desired temperature, and replacing a faulty thermostat.
Step-by-step guide to checking the thermostat
Checking the thermostat is a simple process that can help ensure its proper functioning. Follow these steps:
- Step 1: Locate the thermostat on your wall.
- Step 2: Check if the thermostat is turned on and displaying the correct time.
- Step 3: Set the thermostat to a temperature higher or lower than the current room temperature to see if the heating or cooling system responds.
- Step 4: Observe if the thermostat accurately reflects the temperature change and if the heating or cooling system operates accordingly.
- Step 5: Repeat the process for different temperature settings to ensure consistent functionality.
Adjusting the thermostat to the desired temperature
Once you have confirmed that your thermostat is working correctly, you can adjust it to your desired temperature. Follow these steps:
- Step 1: Press the temperature adjustment buttons on the thermostat to increase or decrease the temperature.
- Step 2: Set the thermostat to a temperature that provides you with the desired level of comfort.
- Step 3: Allow the heating or cooling system some time to adjust and reach the newly set temperature.
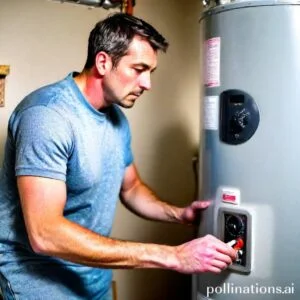
Replacing a faulty thermostat
If you find that your thermostat is not functioning properly, it may be necessary to replace it. Here’s what you need to do:
- Step 1: Turn off the power supply to the thermostat.
- Step 2: Remove the cover of the thermostat.
- Step 3: Disconnect the wires from the thermostat terminals.
- Step 4: Install the new thermostat by connecting the wires to the corresponding terminals.
- Step 5: Replace the thermostat cover and restore the power supply.
Inspecting the Heating Element
Pertaining to keeping your appliances running smoothly, one of the key components to check is the heating element. A faulty heating element can cause a range of problems, from uneven cooking to complete appliance failure. In this section, we will pioneer how to inspect the heating element, identify signs of damage, and replace it if necessary.
1. Identifying signs of a faulty heating element
There are several indicators that can help you determine if your heating element is faulty. One common sign is a lack of heat or inconsistent heating. If you notice that your appliance is not getting as hot as it should or if it takes longer than usual to reach the desired temperature, there may be an issue with the heating element. Additionally, visible damage such as cracks or breaks in the element itself can also be a clear sign of a problem.
Another way to identify a faulty heating element is through unusual noises or smells. If you hear strange sounds coming from your appliance in the course of it is in use or if you notice any unusual odors, pivotal to investigate further as these could be indications of a malfunctioning heating element.
2. Replacing a damaged heating element
If you have determined that your heating element is indeed faulty and needs to be replaced, it is essential to follow the proper steps to ensure a successful replacement. First, make sure to disconnect the appliance from any power source to avoid any accidents. Then, refer to the manufacturer’s instructions or consult a professional to determine the specific replacement part you need.
Once you have obtained the replacement heating element, carefully remove the old one by unscrewing or detaching it according to the appliance’s design. Take note of the connections and wiring before disconnecting them, as you will need to reconnect them properly with the new heating element. Finally, install the new element, secure it in place, and reassemble the appliance.
Inspecting and maintaining the heating element of your appliance is crucial for its optimal performance. By being proactive and addressing any issues with the heating element promptly, you can ensure that your appliance continues to function effectively and provides you with the desired results for years to come.
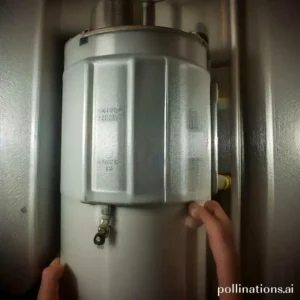
Flushing the Tank
1. How sediment buildup affects water heater temperature
Sediment buildup in a water heater can have a significant impact on its temperature. As water flows into the tank, minerals and other particles present in the water settle at the bottom. Over time, this sediment layer thickens, reducing the efficiency of the heating elements.
When the sediment accumulates at the bottom, it acts as an insulating barrier between the water and the heating elements. This insulation prevents the heat from transferring effectively, resulting in a decrease in water temperature. As a result, your water heater may take longer to heat the water to the desired temperature.
2. Flushing the tank to remove sediment buildup
To address sediment buildup and restore the optimal performance of your water heater, regular tank flushing is essential. Flushing involves draining the tank and flushing out the accumulated sediment.
Here’s a step-by-step guide to flushing your water heater:
i. Turn off the power
Before starting the flushing process, ensure that the power supply to the water heater is turned off. This step is crucial to prevent any accidents or damage during the procedure.
ii. Locate the drain valve
Find the drain valve at the bottom of the tank. It is usually a brass or plastic valve with a hose attachment point.
iii. Attach a garden hose
Connect a garden hose to the drain valve and ensure that the other end is placed in a suitable drainage area or bucket.
iv. Open the drain valve
Open the drain valve by turning it counterclockwise. This will allow the water and sediment to flow out through the hose.
v. Flush the tank
Once the drain valve is open, let the water flow through the hose for several minutes. This will help flush out the sediment from the tank.
vi. Close the drain valve
After flushing, close the drain valve by turning it clockwise. Ensure it is securely closed to prevent any leaks.
vii. Refill the tank
Turn on the water supply to refill the tank. Allow the water heater to fill completely before turning the power back on.

Checking the Dip Tube
The dip tube is an essential component of your ice cream machine, responsible for ensuring a smooth and consistent flow of ice cream mix. Comprehending its function and knowing how to replace a damaged or faulty dip tube is crucial for maintaining the quality of your icy treats.
1. Perceiving the Function of the Dip Tube
The dip tube is a long, cylindrical tube that extends from the top of the ice cream machine’s freezing cylinder to the bottom. Its purpose is to carry the ice cream mix from the cylinder to the dispensing valve, where it is then served to customers. By continuously circulating the mix, the dip tube helps to keep the ice cream at the perfect temperature for serving.
2. Replacing a Damaged or Faulty Dip Tube
If you notice any issues with the flow of your ice cream or suspect that the dip tube may be damaged or faulty, it’s important to replace it promptly. Here are the steps to follow:
- Gather the necessary tools: Before you begin, make sure you have the appropriate tools, such as a wrench or pliers, to safely remove the old dip tube.
- Turn off the machine: Before attempting any repairs, always turn off the ice cream machine and unplug it to ensure your safety.
- Locate the dip tube: The dip tube is typically located near the freezing cylinder, attached to the dispensing valve. Carefully inspect it for any signs of damage or wear.
- Remove the old dip tube: Using the appropriate tools, loosen and remove the old dip tube from the machine. Be gentle to avoid causing further damage.
- Install the new dip tube: Take the new dip tube and securely attach it to the freezing cylinder and the dispensing valve. Make sure it is properly aligned and tightened.
- Test the ice cream machine: Once the new dip tube is in place, turn on the machine and test the flow of the ice cream mix. Ensure that it is dispensing smoothly and consistently.

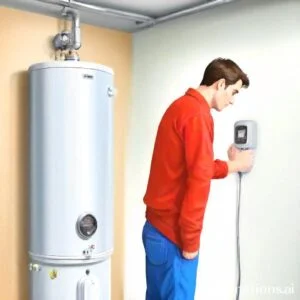
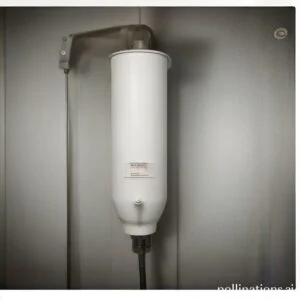
Inspecting the Anode Rod
The anode rod plays a crucial role in maintaining the temperature of your water heater. By preventing corrosion and protecting the tank, it ensures the longevity and efficiency of the system.
1. Importance of the Anode Rod in Maintaining Water Heater Temperature
The anode rod acts as a sacrificial element, attracting corrosive elements in the water and diverting them away from the tank. This process, known as electrolysis, helps to prevent rust and preserve the integrity of the tank. Regular inspection and maintenance of the anode rod are essential to ensure its effectiveness and prolong the lifespan of your water heater.
2. Replacing a Corroded or Damaged Anode Rod
Over time, the anode rod may become corroded or damaged, reducing its ability to protect the tank. When this happens, it is crucial to replace the anode rod promptly. Start by turning off the power and water supply to the water heater. Locate the anode rod, typically found at the top of the tank. Use a wrench to loosen and remove the old anode rod. Replace it with a new one that matches the specifications of your water heater. Tighten the new anode rod securely and reconnect the power and water supply. Regularly inspect and replace the anode rod as needed to ensure the optimal performance and longevity of your water heater.
| Anode Rod Inspection Checklist |
|---|
| 1. Turn off power and water supply |
| 2. Locate the anode rod |
| 3. Use a wrench to loosen and remove the old anode rod |
| 4. Replace with a new anode rod |
| 5. Tighten the new anode rod securely |
| 6. Reconnect power and water supply |
Bottom Line
When your water heater temperature is not reaching the setpoint, it can be frustrating and inconvenient. Although, there are several troubleshooting steps you can take to identify and fix the issue. First, check the thermostat and make sure it is set correctly. If that doesn’t work, check the heating element and replace it if necessary. You may also need to flush the tank to remove any sediment buildup. If all else fails, it may be time to replace your water heater. Remember to always follow safety precautions when working with your water heater. By taking these steps, you can ensure that your water heater is functioning properly and providing you with the hot water you need.
In conclusion, troubleshooting your water heater temperature not reaching setpoint requires patience and attention to detail. By upholding the steps outlined above, you can identify and fix the issue, or determine if it’s time for a replacement. Don’t hesitate to seek professional help if you’re unsure about any of the steps involved. With a little effort, you can enjoy the comfort and convenience of hot water once again.
Read More:
1. How To Prevent Water Heater Temperature Spikes During Power Outages
2. Balancing Water Heater Temperature For Pet Bathing