II. Using a hose to flush out sediment is a simple and effective method that can be done by homeowners themselves.
III. Regularly flushing out sediment can prevent clogging, improve water quality, and save money on energy bills.
In order to maintain the efficiency and longevity of water heaters, fundamental to periodically flush out any sediment that may have accumulated. This can easily be done using a hose to drain and flush the tank.
By removing the sediment, you can prevent clogs, improve water flow, and ensure that your water heater continues to provide hot water effectively. Regular maintenance like this can save you money on repairs and extend the lifespan of your water heater.
So, don’t overlook the simple task of flushing out sediment and keep your water heater running smoothly.
Preparing for the Flush
In regard to maintaining your water heater, it’s important to periodically flush out the tank to remove sediment and ensure optimal performance. Follow these steps to prepare for a successful flush:
1. Turn off the power/gas supply to the water heater
Before starting the flush, it’s crucial to turn off the power or gas supply to the water heater. This will prevent any accidents or damage during the process. Make sure to locate the appropriate switch or valve and switch it off.
2. Allow the water to cool down
Flushing a hot water heater can be dangerous, as the water inside is scalding hot. Give it some time to cool down before proceeding with the flush. This will ensure your safety and prevent any burns or injuries.
3. Gather necessary tools (hose, bucket, gloves, etc.)
To effectively flush the water heater, you’ll need a few essential tools. Gather a hose, bucket, gloves, and any other necessary equipment. The hose will be used to drain the tank, in the course of the bucket will collect the sediment and debris.
Once you’ve completed these preparation steps, you’ll be ready to proceed with flushing your water heater. Remember to carefully follow the manufacturer’s instructions and take all necessary safety precautions. Regular flushing will help prolong the lifespan of your water heater and ensure efficient operation.
| Steps | Description |
|---|---|
| 1. Turn off the power/gas supply to the water heater | Locate and switch off the power or gas supply to the water heater to prevent accidents or damage. |
| 2. Allow the water to cool down | Give the water heater some time to cool down before proceeding with the flush to ensure safety. |
| 3. Gather necessary tools (hose, bucket, gloves, etc.) | Collect the essential tools required for the flush, such as a hose, bucket, gloves, and more. |
Locating the Drain Valve
In this section, we will pioneer the drain valve and its importance in maintaining your water heater. We will also discuss the various types of drain valves and provide guidance on how to identify them.
1. Demonstration of drain valve
The drain valve is a crucial component of your water heater system. It allows you to easily remove sediment and other impurities that can accumulate over time, ensuring the optimal performance and longevity of your unit. By regularly draining your water heater using the drain valve, you can prevent build-up and potential damage.
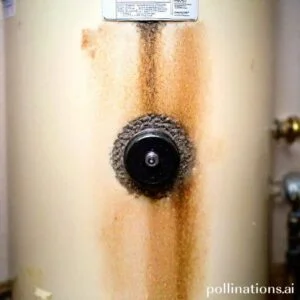
2. Where to find the drain valve on the water heater
The location of the drain valve may vary depending on the type and model of your water heater. Notwithstanding, it is commonly found near the bottom of the tank. Look for a small, threaded valve with a handle or a knob. Indispensable to familiarize yourself with the specific location of the drain valve on your water heater for easy access during maintenance.
3. Different types of drain valves and how to identify them
There are several types of drain valves that you may encounter. The most common ones include brass, plastic, and PVC valves. Brass valves are durable and typically found in older water heaters. Plastic valves are more common in newer models and are lightweight. PVC valves, made of polyvinyl chloride, are resistant to corrosion.
To identify the type of drain valve in your water heater, examine the material and construction. Brass valves have a metallic appearance, whilst plastic valves are usually made of durable thermoplastics. PVC valves are easily recognizable due to their white or gray color and flexibility.
It is essential to select the right type of drain valve for replacement or maintenance purposes. Consult your water heater’s manual or seek professional advice if you are unsure about the type of drain valve present in your unit.
Flushing Out the Sediment
Regularly flushing out the sediment from your water heater is an important maintenance task that can help prolong its lifespan and ensure its optimal performance. By complying with these steps, you can effectively remove any accumulated sediment:
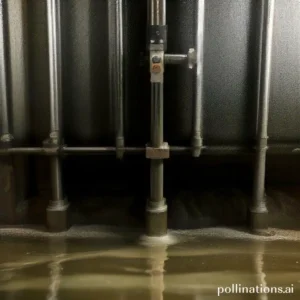
1. Attaching the hose to the drain valve
To begin the flushing process, locate the drain valve on your water heater. Attach a hose to the valve, ensuring a secure connection to avoid any leaks or spills.
2. Directing the hose to a safe drainage area
Next, carefully position the other end of the hose in a safe drainage area. This can be an outdoor drain, a bucket, or any other suitable location where the sediment-laden water can safely flow out.
3. Opening the drain valve and allowing the water to flow out
Once the hose is securely attached and positioned, open the drain valve on your water heater. This will allow the water, along with the sediment, to flow out through the hose and into the designated drainage area.
4. How long to flush out the sediment
The duration of the flushing process may vary depending on the amount of sediment accumulated in your water heater. It’s recommended to let the water flow out for at least 5-10 minutes or until it runs clear without any visible sediment.
5. Signs that the sediment has been completely flushed out
Once the flushing process is complete, there are a few indicators to look out for to ensure that the sediment has been effectively flushed out. These include:
- Clear and sediment-free water flowing out of the hose
- Noises or rumbling sounds from the water heater reducing or ceasing
- Improved water heater efficiency and performance
Regularly flushing out the sediment from your water heater can help prevent issues such as reduced efficiency, clogs, or even potential damage to the heating elements. By heeding these simple steps, you can maintain the longevity and effectiveness of your water heater.

Cleaning Up
In this section, we will discuss the necessary steps to clean up after a maintenance task. Integral to follow these steps in order to ensure the proper functioning of your equipment.
1. Turning off the drain valve and removing the hose
Before you begin cleaning up, it is essential to turn off the drain valve and remove the hose. This will prevent any water or debris from flowing out and causing a mess. Make sure to close the drain valve securely and detach the hose carefully.
2. Checking for any leaks
Once the drain valve and hose have been removed, take a moment to inspect the area for any leaks. Look for any signs of water or gas leakage and address them immediately. It is crucial to fix any leaks before proceeding further.
3. Reconnecting the power/gas supply
After ensuring that there are no leaks, it is time to reconnect the power or gas supply. Follow the manufacturer’s instructions to safely reconnect the necessary connections. Double-check that everything is securely attached before moving on.
4. Turning on the water supply and checking for proper functioning
Now that the power or gas supply has been reconnected, it is time to turn on the water supply. Slowly open the valve and check for proper functioning. Pay attention to any unusual noises or irregularities. If everything seems to be in order, you can proceed confidently.
| Step | Description |
|---|---|
| 1 | Turning off the drain valve and removing the hose |
| 2 | Checking for any leaks |
| 3 | Reconnecting the power/gas supply |
| 4 | Turning on the water supply and checking for proper functioning |

Maintenance Tips
Relating to keeping your water heater running smoothly, regular maintenance is key. In this section, we will navigate important maintenance tasks to ensure the longevity and proper functioning of your water heater.
1. Flushing out sediment
One crucial task to include in your maintenance routine is flushing out sediment from the water heater. Over time, minerals and sediment can accumulate at the bottom of the tank, causing issues with efficiency and performance. It is recommended to flush out the tank at least once a year to remove any sediment build-up.
2. Other maintenance tasks
In addition to flushing out sediment, there are other maintenance tasks that you should perform regularly. These tasks include:
- Checking the pressure relief valve: Ensure that the pressure relief valve is working correctly by testing it periodically.
- Inspecting for leaks: Check for any signs of leaks or water damage around the water heater. Address any leaks immediately to prevent further damage.
- Testing the temperature and pressure: Verify that the temperature and pressure settings are within the recommended range. Adjust if necessary.
- Removing debris from the burner: If you have a gas water heater, clean the burner and remove any debris that may have accumulated.
3. Signs that professional attention is needed
Whilst regular maintenance can help prevent many issues, there are signs that indicate the need for professional attention. If you notice any of the following, it is recommended to contact a professional:
- Insufficient hot water: If your water heater is no longer providing enough hot water, it may be a sign of a more significant problem.
- Strange noises: Unusual noises coming from the water heater, such as rumbling or banging sounds, could indicate an issue that requires professional assistance.
- Leaks: Any visible leaks or pooling water around the water heater should be addressed promptly to prevent further damage.
- Inconsistent water temperature: If the water temperature fluctuates unexpectedly, it may be a sign of an underlying problem.
Maintaining your water heater is essential for its optimal performance and longevity. By conforming to these maintenance tips and being aware of warning signs, you can ensure that your water heater continues to provide you with reliable hot water.
| Frequency | Maintenance Task |
|---|---|
| At least once a year | Flush out sediment from the water heater |
| Periodically | Check the pressure relief valve |
| Regularly | Inspect for leaks |
| Regularly | Test the temperature and pressure |
| Regularly | Remove debris from the burner (for gas water heaters) |
Bottom Line
Flushing out sediment from your water heater is an essential maintenance task that can extend the life of your appliance and improve its efficiency. Using a hose to flush out sediment is a simple and cost-effective method that can be done by most homeowners. Albeit, it’s important to follow the manufacturer’s instructions and safety precautions to avoid damaging your water heater or injuring yourself. Regular flushing can prevent sediment buildup, which can cause corrosion, reduce heating efficiency, and even lead to leaks or burst tanks. By taking the time to flush out sediment from your water heater, you can save money on energy bills, avoid costly repairs, and ensure that your appliance provides reliable hot water for years to come.
So, if you haven’t flushed your water heater recently, it’s time to do so. Don’t wait until you notice problems or your water heater breaks down. Make flushing a part of your routine maintenance and enjoy the benefits of a well-maintained water heater. Remember, a little effort now can save you a lot of money and hassle in the long run.
Read More:
1. Chemical Solutions For Sediment Removal In Water Heaters
2. Sediment Removal In Solar Water Heaters