II. Follow simple DIY steps to clean your water heater and improve its efficiency.
III. Save money and time by avoiding professional help and doing it yourself.
Sediment buildup can lead to reduced efficiency and potential damage to your water heater, so it’s important to address this issue regularly. By observing a few simple steps, you can effectively remove the sediment and improve the performance of your water heater without the hassle of draining the entire system.
Let’s traverse this cost-effective and convenient solution for sediment removal in your water heater.
Tools and Materials Needed
Safety gear
When working with tools and materials, imperative to prioritize safety. Make sure to wear the appropriate safety gear, such as gloves and goggles, to protect yourself from any potential hazards.
Wrench or pliers
A wrench or pliers are essential tools for any DIY project. These tools can be used to tighten or loosen nuts and bolts, making them indispensable when assembling or disassembling various components.
Garden hose
A garden hose is a versatile tool that can be used for various tasks, such as watering plants or cleaning outdoor surfaces. Vital to have a reliable garden hose on hand for any outdoor maintenance or gardening needs.
Bucket
A bucket is a simple yet essential tool that can be used for a wide range of purposes. Whether you need to carry water, mix ingredients, or collect debris, a durable bucket will always come in handy during DIY projects.
Vinegar or citric acid
Vinegar or citric acid are natural cleaning agents that can be used for a variety of purposes. From removing stubborn stains to descaling appliances, these acidic substances are effective and eco-friendly alternatives to harsh chemical cleaners.
| Item | Description |
|---|---|
| Safety gear | Gloves and goggles for personal protection |
| Wrench or pliers | Tools for tightening or loosening nuts and bolts |
| Garden hose | Flexible tube for watering or cleaning purposes |
| Bucket | Container for carrying or collecting various materials |
| Vinegar or citric acid | Natural cleaning agents for various tasks |
Preparation
Before starting the process of DIY sediment removal without draining the water heater, fundamental to follow a few essential steps. By properly preparing, you can ensure a smooth and successful sediment removal process. Here are the necessary steps:
1. Turn off the power supply
The first step in preparing for sediment removal is to turn off the power supply to the water heater. This step is crucial to ensure your safety during the process. Locate the circuit breaker or fuse box and switch off the power supply specifically dedicated to the water heater.
2. Turn off the cold water supply
Next, you need to turn off the cold water supply to the water heater. Look for the shut-off valve, usually located near the top of the tank or on the water pipe leading to the heater. Turn the valve clockwise to shut off the water supply.
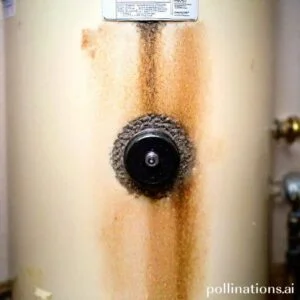
3. Locate the drain valve
Once the power and water supply are turned off, you need to locate the drain valve on the water heater. The drain valve is typically located at the bottom of the tank. It is a small faucet-like valve used to drain the water from the tank.
4. Connect the garden hose
To effectively remove sediment without draining the entire water heater, you will need to connect a garden hose to the drain valve. Attach one end of the garden hose to the drain valve and make sure the other end is placed in a suitable drainage area or bucket to collect the sediment and water.
Flushing the Tank
Regular maintenance of your tank is essential to ensure its longevity and efficiency. Flushing the tank helps remove sediment buildup and keeps the water clean and clear. Follow these steps to effectively flush your tank:
1. Open the drain valve
Locate the drain valve at the bottom of your tank and carefully open it. This will allow the water to flow out.
2. Let the water flow out
Allow the water to flow out of the tank through the open drain valve. This will help remove any sediments that may have settled at the bottom.
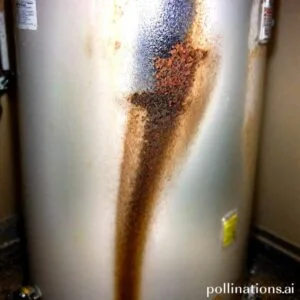
3. Check for sediment buildup
Whilst the water is draining, inspect the water for any signs of sediment buildup. Sediment can affect the efficiency of your tank and cause clogs in your plumbing system.
4. Repeat the process until the water runs clear
If you notice any sediment in the water, repeat the flushing process until the water runs clear. This ensures that all the sediment is effectively removed from the tank.
Cleaning the Tank
Keeping your tank clean is essential for ensuring the longevity and efficiency of your system. Follow these simple steps to clean your tank effectively:
1. Turn off the drain valve
Before beginning the cleaning process, make sure to turn off the drain valve to prevent any water from flowing out.
2. Close the pressure relief valve
Next, close the pressure relief valve to ensure that no water or pressure escapes during the cleaning process.
3. Pour vinegar or citric acid into the tank
To remove any mineral deposits or build-up, pour a mixture of vinegar or citric acid into the tank. These natural solutions are effective in breaking down and dissolving any residue.
4. Let it sit for a few hours
Allow the vinegar or citric acid solution to sit in the tank for a few hours. This will give it enough time to penetrate and dissolve the stubborn deposits.
5. Flush the tank with clean water
After the solution has had time to work its magic, flush the tank with clean water to remove any remaining residue. This will ensure that your tank is thoroughly cleaned and ready for use.
Regularly cleaning your tank is crucial for maintaining its efficiency and prolonging its lifespan. By upholding these simple steps, you can keep your tank in optimal condition and ensure the best performance from your system.
| Step | Description |
|---|---|
| 1 | Turn off the drain valve |
| 2 | Close the pressure relief valve |
| 3 | Pour vinegar or citric acid into the tank |
| 4 | Let it sit for a few hours |
| 5 | Flush the tank with clean water |

Restarting the Water Heater
In regard to restarting your water heater, there are a few steps you need to follow to ensure it functions properly. Here is a detailed guide on how to restart your water heater:
1. Remove the garden hose
The first step in restarting your water heater is to remove the garden hose if it was connected. This will allow for proper water flow and prevent any potential damage.
2. Close the drain valve
Next, make sure to close the drain valve. This is important to prevent any water from escaping and to ensure that the water heater can properly build up pressure.
3. Turn on the cold water supply
After closing the drain valve, it is time to turn on the cold water supply. This will allow fresh water to enter the water heater and help it heat up efficiently.
4. Turn on the power supply
Once the cold water supply is turned on, you can now turn on the power supply for the water heater. This will activate the heating element and start the heating process.
5. Wait for the water heater to heat up
Bottom Line
Removing sediment from your water heater is an important maintenance task that can extend the life of your appliance and improve its efficiency. In the course of many people opt to hire a professional to do this job, it is possible to do it yourself without draining the tank. By abiding by the steps outlined in this article, you can safely and effectively remove sediment from your water heater using basic tools and materials. Remember to turn off the power and water supply before starting, and to take precautions to avoid burns and other injuries. With a little bit of effort, you can keep your water heater running smoothly and enjoy hot water for years to come.
Overall, DIY sediment removal is a cost-effective and practical solution for homeowners who want to maintain their water heaters. By taking the time to perform this task regularly, you can prevent clogs, leaks, and other problems that can lead to costly repairs or replacements. Whether you are a seasoned DIYer or a novice, you can use the tips and techniques in this article to keep your water heater in top condition and avoid unnecessary expenses. So why wait? Get started today and enjoy the benefits of a clean and efficient water heater!
Read More:
1. Signs Your Water Heater Needs Sediment Removal
2. Sediment Flushing Frequency For Hard Water Areas