II. There are several DIY methods for removing sediment from water heaters, including flushing the tank, using a wet/dry vacuum, and installing a sediment filter.
III. Regular maintenance and sediment removal can not only extend the life of your water heater but also improve water quality and save you money on energy bills.
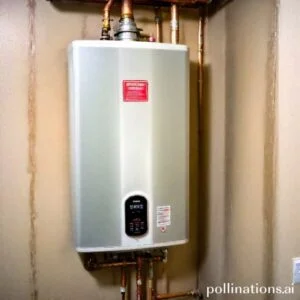
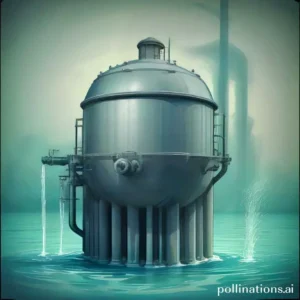
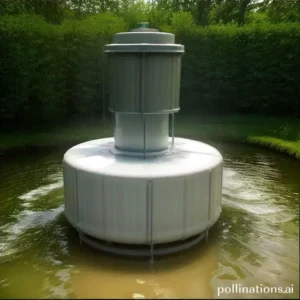
Sediment buildup in water heaters can lead to reduced efficiency and potential damage, so it’s essential to address this issue regularly. We will pioneer simple yet effective techniques that you can use to remove sediment and restore the performance of your water heater.
By implementing these DIY methods, you can ensure a longer lifespan for your appliance and enjoy hot water without any disruptions.
Signs of Sediment Buildup
Touching on maintaining a well-functioning water heater, fundamental to be aware of the signs of sediment buildup. Sediment, such as minerals and debris, can accumulate over time and cause various issues. Perceiving these signs, you can take proactive measures to prevent further damage and ensure the longevity of your water heater.
1. Decreased Water Pressure
One of the first signs of sediment buildup in a water heater is a noticeable decrease in water pressure. As sediment accumulates at the bottom of the tank, it can restrict the flow of water, leading to reduced pressure in your faucets and showerheads. If you notice a significant drop in water pressure, it may be time to address the sediment buildup in your water heater.
2. Strange Noises
If you hear unusual sounds coming from your water heater, it could be a sign of sediment buildup. As water is heated and circulated through the tank, sediment can harden and create a layer at the bottom. This sediment layer can cause rumbling, popping, or banging noises as the water heats up. Ignoring these sounds can lead to further damage to your water heater.
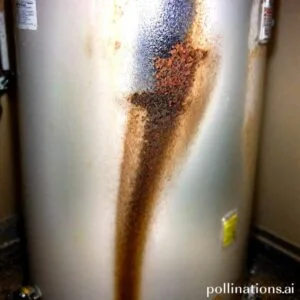
3. Discolored Water
Another indicator of sediment buildup is discolored water. As sediment mixes with the water in your tank, it can cause the water to become murky, brown, or rust-colored. If you notice a change in the color of your hot water, it is likely due to sediment accumulation. Discolored water not only affects the appearance but can also impact the quality of your water.
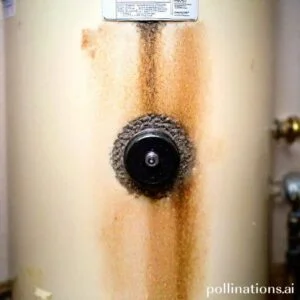
4. Shorter Lifespan of Water Heater
Sediment buildup can significantly reduce the lifespan of your water heater. As sediment accumulates and hardens, it can create a barrier between the heating element and the water. This insulation effect forces the water heater to work harder and consume more energy to heat the water. Over time, the added strain can lead to premature wear and tear, ultimately shortening the lifespan of your water heater.
5. Increased Energy Bills
If you’ve noticed a sudden increase in your energy bills, sediment buildup may be to blame. As mentioned earlier, sediment can act as an insulator, making it harder for your water heater to efficiently heat the water. This inefficiency can result in increased energy consumption and higher utility bills. By contending with sediment buildup, you can help reduce your energy costs and save money in the long run.
Table: Facts About Sediment Buildup
| Fact | Description |
|---|---|
| Sediment Buildup | Sediment refers to minerals and debris that accumulate at the bottom of a water heater tank. |
| Causes | Sediment buildup is primarily caused by hard water, which contains high mineral content. |
| Prevention | Regular maintenance, including flushing the tank, can help prevent sediment buildup. |
| Impact on Efficiency | Sediment buildup reduces the efficiency of a water heater, leading to increased energy consumption. |
| Professional Assistance | In severe cases of sediment buildup, it is recommended to seek professional help for proper cleaning and maintenance. |
Materials Needed for DIY Sediment Removal
In regard to removing sediment from your appliances or plumbing fixtures, having the right materials is essential. Here is a list of the necessary items you will need to successfully complete the task:
1. Garden Hose
A garden hose will be your primary tool for flushing out the sediment. Make sure it is long enough to reach the affected area and has a nozzle attachment for better control of the water flow.
2. Screwdriver
A screwdriver will come in handy for loosening any screws or bolts that are securing the appliance or fixture. This will allow you to access the sediment buildup more easily.
3. Bucket
A bucket is necessary for collecting the water and sediment that will be flushed out during the cleaning process. It will help prevent any mess and make the cleanup easier.
4. Vinegar or Descaling Solution
To effectively remove the sediment, you will need either vinegar or a descaling solution. These substances work to break down and dissolve the mineral deposits, making them easier to flush out.
5. Pliers
Pliers may be required to remove any stubborn parts or components that are obstructing access to the sediment. They will provide you with the necessary grip and leverage to safely remove these obstacles.
Steps for DIY Sediment Removal
Regular maintenance is crucial for ensuring the optimal performance and longevity of your water heater. One essential aspect of maintenance is removing sediment buildup from the tank. Sediment accumulation can lead to decreased efficiency and even damage to the water heater. Follow these simple steps to successfully remove sediment from your water heater.
1. Turn off the Power or Gas Supply
Prior to performing any maintenance tasks on your water heater, it is essential to ensure your safety. Locate the power source or gas supply connected to your water heater and turn it off. This step will prevent any accidents or injuries during the sediment removal process.
2. Turn off the Cold Water Supply
The next step is to turn off the cold water supply valve. This valve is typically located near the top of the water heater. Shutting off the cold water supply will prevent any additional water from entering the tank during the sediment removal process.
3. Drain the Tank
Attach a hose to the drain valve at the bottom of the water heater and place the other end in a suitable drainage area. Open the drain valve and allow the water to flow out of the tank. Be cautious as the water may be hot. Ensure the tank is fully drained before proceeding to the next step.
4. Flush the Tank with Water
With the tank drained, it’s time to flush out any remaining sediment. Close the drain valve and slowly turn on the cold water supply. This will create a forceful flow of water that will help dislodge and flush out sediment particles from the tank. Allow the water to run for a few minutes or until it runs clear.
5. Use Vinegar or Descaling Solution (if necessary)
If there is stubborn sediment buildup in your water heater, you may need to use a descaling solution. Vinegar is a commonly used and effective descaling agent. Mix equal parts vinegar and water and pour it into the tank. Let the solution sit for a few hours to dissolve the sediment. Afterward, drain the tank again and flush it with clean water.
6. Reconnect the Tank and Turn on the Water Supply
Once the sediment removal process is complete, reconnect the tank by closing the drain valve and ensuring all connections are tight. Turn on the cold water supply valve to refill the tank. Check for any leaks or unusual noises. Finally, turn on the power or gas supply to resume the normal functioning of your water heater.
Tips for Preventing Sediment Buildup
1. Regular Maintenance
Regular maintenance is essential for preventing sediment buildup in your home’s water system. By upholding a few simple steps, you can keep your water clean and sediment-free.
- Inspect your pipes and plumbing fixtures regularly to check for any signs of sediment buildup. This includes checking faucets, showerheads, and toilets.
- If you notice any sediment, flush out your pipes by running water at full force for a few minutes. This will help remove any loose particles.
- In addition to regular flushing, consider scheduling professional maintenance for your water system. A professional can clean your pipes and identify any potential issues before they become major problems.
2. Use a Water Softener
One of the main causes of sediment buildup is hard water. Hard water contains high levels of minerals, such as calcium and magnesium, which can leave behind deposits in your pipes and fixtures. Using a water softener can help prevent this.
- A water softener works by removing the minerals from the water, leaving it soft and less likely to cause sediment buildup.
- Make sure to regularly check and maintain your water softener to ensure it is functioning properly.
- Consider consulting with a water treatment professional to determine the best water softener system for your home.
3. Install a Sediment Filter
Another effective way to prevent sediment buildup is by installing a sediment filter in your water system.
- A sediment filter helps to trap and remove any particles or debris in the water before it reaches your pipes and fixtures.
- Regularly clean and replace the sediment filter to ensure it is working efficiently.
- Consult with a professional to determine the appropriate size and type of sediment filter for your specific needs.
4. Adjust the Temperature
Temperature can also play a role in sediment buildup in your water system.
- Hot water can cause minerals to dissolve more easily, leading to increased sediment buildup. Consider lowering the temperature of your hot water heater to reduce this risk.
- Additionally, flushing your hot water heater regularly can help remove any accumulated sediment.
- Follow the manufacturer’s instructions for adjusting the temperature and flushing your hot water heater.
| Tips for Preventing Sediment Buildup |
|---|
| Regular Maintenance |
| Use a Water Softener |
| Install a Sediment Filter |
| Adjust the Temperature |

When to Call a Professional
Having a well-functioning water heater is crucial for a comfortable and convenient lifestyle. Conversely, there are certain situations where it is best to seek the expertise of a professional. Below are some signs that indicate it’s time to call in a professional plumber:
1. Heavy Sediment Buildup
If you notice a significant amount of sediment accumulating in your water heater, it’s a clear indication that something is not right. Sediment buildup can affect the efficiency and lifespan of your water heater, leading to potential issues like reduced hot water supply or even complete breakdown. A professional plumber can assess the situation, flush out the sediment, and recommend any necessary repairs or replacements.
2. Damaged or Leaking Tank
A damaged or leaking water heater tank is a serious problem that requires immediate attention. Ignoring this issue can lead to water damage in your home and potential safety hazards. A professional plumber has the expertise to identify the source of the damage or leak and provide appropriate solutions, such as repairing the tank or installing a new one.
3. Old or Outdated Water Heater
If your water heater is old or outdated, it may not be functioning as efficiently as it should. Older models may have lower energy efficiency, resulting in higher utility bills. Additionally, outdated water heaters may not meet the current safety standards. A professional plumber can assess the condition of your water heater and recommend an upgrade to a more efficient and safer model.
| Signs to Call a Professional |
|---|
| Heavy sediment buildup |
| Damaged or leaking tank |
| Old or outdated water heater |
Bottom Line
Removing sediment from your water heater is crucial for its longevity and efficiency. DIY methods such as flushing the tank, using a wet/dry vacuum, or installing a sediment filter can help you get rid of the buildup. Notwithstanding, it’s important to follow safety precautions and manufacturer’s instructions to avoid any damage or injury.
If you’re not comfortable performing these tasks yourself, it’s best to hire a professional plumber to do it for you. Regular maintenance and sediment removal can save you money on energy bills and prevent costly repairs or replacements in the future. Don’t neglect your water heater and keep it running smoothly with proper care and attention.
Read More:
1. Professional Services For Sediment Removal In Water Heaters
2. Signs Of Sediment Buildup In Water Heaters