II. However, there are several common mistakes that people make during the flushing process that can lead to problems down the line.
III. These mistakes include failing to turn off the power supply, not draining the tank completely, and not properly refilling the tank after flushing.
During water heater flushing, there are several common mistakes that people often make. One of these is not turning off the power supply to the water heater before beginning the flushing process.
This can lead to electrical accidents and damage to the heater. Another mistake is not properly draining the water from the heater before flushing.
This can result in sediment buildup and a less effective flushing. Additionally, some people forget to close the drain valve after flushing, causing water leakage.
Pivotal to be aware of these common mistakes in order to ensure a successful and smooth water heater flushing process.
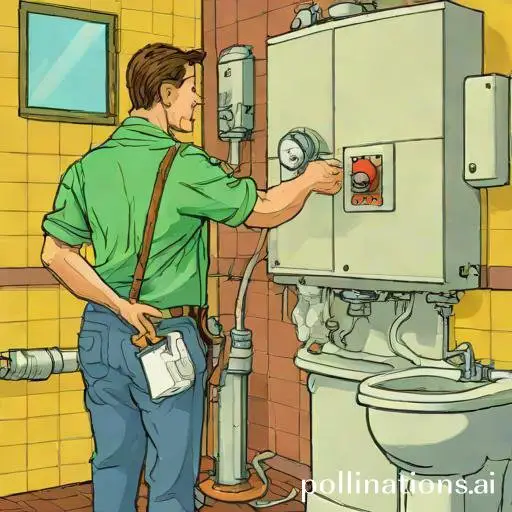
Not Turning Off the Power
In this section, we will discuss the importance of turning off the power and provide step-by-step instructions on how to do so before flushing.
Clarification of the Importance of Turning Off the Power
Turning off the power before flushing is crucial for several reasons. First and foremost, it ensures your safety and the safety of others. Flushing with the power on can result in electrical shocks or damage to the plumbing system. By turning off the power, you eliminate these risks and ensure a smooth and safe flushing process.
Additionally, turning off the power helps conserve energy and reduce utility costs. Flushing without powering off the electrical components means unnecessary energy consumption. By taking a simple step to turn off the power, you contribute to a more sustainable and eco-friendly environment.
Steps to Turn Off the Power Before Flushing
Follow these steps to turn off the power before flushing:
| Step 1: | Locate the power switch or breaker that controls the flushing mechanism. |
| Step 2: | Flip the switch to the “off” position or switch off the corresponding breaker. |
| Step 3: | Verify that the power is indeed off by checking if the flushing mechanism is inactive. |
Not turning off the power before flushing can lead to unnecessary risks and energy wastage. Take a few moments to turn off the power, and you’ll contribute to a safer and greener environment.
Not Letting the Water Cool Down
Relating to water heater flushing, one common mistake that people often make is not letting the water cool down before starting the process. Whilst it may seem like a small detail, it is actually quite important to allow the water to cool down completely before attempting to flush the system.
1. Interpretation of why it’s important to let the water cool down
Letting the water cool down is important for a couple of reasons. In the first place, if the water is still hot, it can be dangerous to handle. Hot water can cause burns or scalds, so it’s crucial to prioritize safety. Furthermore, flushing hot water can put unnecessary strain on the plumbing system and the water heater itself. Flushing hot water can cause damage to the pipes or the tank, leading to potential leaks or other issues.
2. Time required for water to cool down
The time required for the water to cool down will depend on various factors such as the initial temperature of the water and the ambient temperature of the surrounding area. On average, it is recommended to allow the water to cool down for at least a few hours before attempting to flush the system. This will ensure that the water is at a safe and manageable temperature.
3. Risks of not letting the water cool down
If you don’t let the water cool down before flushing the system, you are putting yourself at risk of burns or scalds. Additionally, the hot water can cause damage to the plumbing system and the water heater itself. The increased pressure from flushing hot water can lead to leaks, bursts, or other issues that may require costly repairs.
Not Draining the Tank Completely
Draining the tank completely is a crucial step in maintaining the efficiency and longevity of your equipment. By removing all the residual liquids and sediments, you can prevent potential issues and ensure optimal performance. Let’s traverse the importance of draining the tank completely and the steps involved in this process.
1. Importance of Draining the Tank Completely
Draining the tank completely is essential to avoid contamination and buildup. Over time, sediments, rust, and other impurities can accumulate at the bottom of the tank, affecting the quality of your equipment. By regularly draining the tank, you can eliminate these contaminants and prevent clogging or damage.
2. Steps to Drain the Tank Completely
To drain the tank completely, follow these simple steps:
- Turn off the power supply and allow the tank to cool down.
- Locate the drain valve at the bottom of the tank.
- Attach a hose to the valve and place the other end in a suitable drainage area.
- Open the drain valve and let the liquid flow out.
- Ensure the tank is fully emptied before closing the drain valve.
3. Risks of Not Draining the Tank Completely
Failure to drain the tank completely can lead to various problems:
- Contamination: Sediments and impurities can affect the quality and taste of the liquids stored in the tank.
- Clogging: Accumulated sediments can clog pipes, valves, and other components, reducing the efficiency of your equipment.
- Corrosion: If water or corrosive liquids are left in the tank, it can cause rust and corrosion, damaging the tank and its surrounding parts.
- Reduced Lifespan: Neglecting to drain the tank completely can shorten its lifespan, leading to costly repairs or replacement.

Not Checking the Anode Rod
The anode rod plays a crucial role in the functioning of your water heater. It is a sacrificial component that prevents corrosion by attracting corrosive elements in the water. Neglecting to check the anode rod can lead to significant damage and reduce the lifespan of your water heater.
1. Purpose of the Anode Rod
The anode rod is made of a material that is more reactive to corrosion than the metal of the water heater tank. It is typically made of magnesium or aluminum. When the water heater is in use, the anode rod attracts corrosive elements such as minerals and sediments, preventing them from attacking the tank walls.
2. Importance of Checking the Anode Rod during Flushing
Regular flushing of your water heater is essential to remove sediments and maintain its efficiency. During the flushing process, it is crucial to check the condition of the anode rod. Over time, the anode rod gets depleted and needs replacement. If you neglect to check it during flushing, you may miss the opportunity to replace it before it becomes ineffective.
3. Steps to Check the Anode Rod
Checking the anode rod is a simple process that can be done by observing these steps:
- Turn off the power supply to the water heater.
- Locate the anode rod access point on top of the water heater.
- Use a wrench to loosen and remove the anode rod.
- Inspect the condition of the anode rod. If it is heavily corroded or less than 50% intact, it needs replacement.
- If replacement is needed, purchase a new anode rod of the same type and size.
- Apply plumber’s tape to the threads of the new anode rod to ensure a tight seal.
- Insert the new anode rod into the access point and tighten it securely.
- Turn on the power supply to the water heater.
| Anode Rod | Importance |
|---|---|
| Prevents corrosion | Extends water heater lifespan |
| Attracts corrosive elements | Maintains efficiency |
| Needs regular checking | Prevents damage |

Not Flushing the Tank Regularly
Regular flushing of the tank is crucial to maintain the optimal functioning and longevity of your system. It is necessary to prevent any buildup of sediment, mineral deposits, and bacteria that can compromise the performance and safety of your tank.
1. Exposition of the importance of regular flushing
Regular flushing helps to remove accumulated sediment and mineral deposits that can settle at the bottom of the tank over time. These deposits can affect the efficiency of the tank, reducing its heating capacity and leading to increased energy consumption. Flushing also helps to eliminate any bacteria or impurities that may have entered the tank, ensuring clean and safe water.
2. Recommended frequency for flushing
The frequency of tank flushing depends on various factors such as water quality, usage, and tank size. As a general guideline, it is recommended to flush the tank at least once a year. Notwithstanding, in areas with hard water or high sediment content, more frequent flushing may be necessary. Consulting a professional plumber can help determine the ideal frequency for your specific situation.
3. Risks of not flushing the tank regularly
Failure to flush the tank regularly can lead to several issues. First and foremost, sediment and mineral deposits can accumulate, reducing the tank’s efficiency and leading to higher energy bills. Additionally, these deposits can cause corrosion and damage to the tank, resulting in leaks and costly repairs. Moreover, the presence of bacteria or impurities in the tank can pose health risks, especially if the water is used for drinking or cooking.
| Benefits of Regular Flushing | Risks of Not Flushing |
|---|---|
|
|
Bottom Line
Flushing your water heater is an important maintenance task that can extend the life of your appliance and improve its efficiency. Notwithstanding, there are some common mistakes that homeowners make during the flushing process that can lead to damage or ineffective results.
To avoid these mistakes, be sure to follow the manufacturer’s instructions carefully, use the right tools and materials, and take the time to properly drain and refill your tank. Additionally, consider hiring a professional plumber to perform the task if you are unsure of your abilities or if you have an older or more complex system.
By taking the necessary precautions and avoiding these common mistakes, you can ensure that your water heater remains in good working order and provides you with reliable hot water for years to come.
Read More:
1. Flushing For Rusty Water In A Water Heater
2. Can Flushing Solve Water Heater Odor Problems?


