
II. Flushing removes sediment and debris that can damage the new dip tube.
III. Flushing can improve the overall efficiency and lifespan of the water heater.
Flushing your water heater is a crucial step in maintaining its efficiency and prolonging its lifespan. By removing sediments and mineral deposits that accumulate over time, you can ensure that your water heater functions optimally.
We will probe the benefits of regular flushing and provide tips on how to properly replace a dip tube. With our helpful guide, you can optimize the performance of your water heater and enjoy a continuous supply of hot water.
Signs of a Faulty Dip Tube
A dip tube is an essential component of a water heater that delivers cold water to the bottom of the tank, ensuring efficient heating. Conversely, when this tube malfunctions, it can lead to various problems. Discerning the signs of a faulty dip tube, homeowners can take prompt action to avoid further issues.
1. Decreased Hot Water Supply
One of the primary indicators of a faulty dip tube is a sudden decrease in hot water supply. If you notice that your showers are becoming shorter or the water temperature is not as hot as it used to be, it could be a sign that the dip tube is deteriorating. The compromised tube may allow cold water to mix with the hot water, resulting in reduced hot water availability.
2. Discolored Water
Another sign of a faulty dip tube is discolored water. If you turn on the hot water tap and notice a brown or rusty tint, it indicates that the dip tube may be disintegrating. The discolored particles from the deteriorating tube can mix with the water supply, leading to unpleasant visual changes. It is crucial to address this issue promptly to ensure the water quality remains safe for use.
3. Strange Noises Coming from the Water Heater
Faulty dip tubes can also cause strange noises to emanate from the water heater. If you hear gurgling or popping sounds when the heater is operating, it could be a result of the dip tube breaking down. The disintegration of the tube can create disruptions in the water flow, leading to unusual noises as the water interacts with the damaged components. Ignoring these sounds may exacerbate the problem, potentially leading to further damage to the water heater.
When encountering any of these signs, it is advisable to contact a professional plumber to inspect and repair the faulty dip tube. Prompt action can prevent further damage to the water heater and ensure a continuous supply of hot water. By approaching these issues promptly, homeowners can maintain the efficiency and lifespan of their water heating system.
| Signs of a Faulty Dip Tube |
|---|
| 1. Decreased hot water supply |
| 2. Discolored water |
| 3. Strange noises coming from the water heater |
Steps to Replace a Water Heater Dip Tube
Replacing a water heater dip tube is a straightforward process that can help improve the efficiency and performance of your water heater. Follow these steps to replace a water heater dip tube:
1. Turning off the power and water supply
The first step in replacing a water heater dip tube is to ensure safety by turning off the power supply. Locate the circuit breaker for the water heater and switch it off. Additionally, turn off the water supply by closing the valve connected to the water heater.
2. Draining the water heater
Before removing the old dip tube, indispensable to drain the water heater. Connect a hose to the drain valve at the bottom of the water heater and place the other end in a suitable drainage area. Open the valve and allow the water to drain completely.
3. Removing the old dip tube
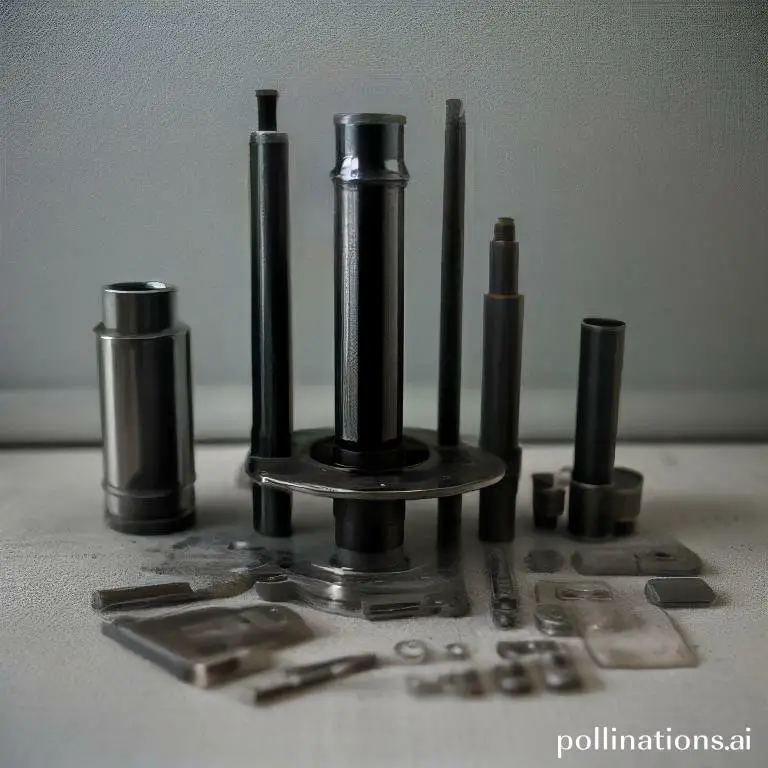
Once the water heater is drained, you can proceed to remove the old dip tube. The dip tube is typically located near the top of the water heater and is connected to the cold water inlet pipe. Use a wrench or pliers to loosen and disconnect the fittings, then carefully remove the old dip tube.
4. Installing the new dip tube
With the old dip tube removed, it’s time to install the new one. Ensure that the new dip tube is of the correct size and length for your water heater. Insert the new dip tube into the cold water inlet pipe and secure it with the fittings. Tighten the fittings firmly to prevent any leaks.
5. Refilling the water heater
After the new dip tube is installed, it’s time to refill the water heater. Close the drain valve and open the water supply valve. Allow the water heater to fill up completely before turning on the power supply. Check for any leaks and ensure that the water heater is functioning properly.
Flushing your water heater for improved performance
Regular maintenance of your water heater is essential to ensure optimal performance and longevity. One important maintenance task is flushing your water heater to remove sediment and mineral buildup. Flushing your water heater can improve its efficiency, prevent problems, and extend its lifespan.
1. Preparing the water heater for flushing
Prior to flushing your water heater, you need to take a few steps to prepare it. Start by turning off the power supply to the water heater, either by switching off the circuit breaker or shutting off the gas supply. This will prevent any accidents or damage during the flushing process. Next, locate the drain valve at the bottom of the water heater and place a bucket or a hose beneath it to collect the water.
2. Flushing the water heater
Now that you’ve prepared the water heater, it’s time to flush it. Open the drain valve carefully, allowing the water to flow out into the bucket or hose. Be cautious as the water may be hot. Let the water run until it appears clear and free of sediment. This process may take several minutes. Flushing the water heater will remove any accumulated sediment, improving its efficiency and preventing clogs or blockages.
3. Refilling the water heater
Once you’ve successfully flushed the water heater, it’s time to refill it. Close the drain valve and remove the hose or bucket. Turn on the water supply to the heater and allow it to fill. At the same time the water heater is refilling, open a hot water faucet in your home to release any trapped air. Once the water heater is full, turn on the power supply or relight the pilot light, depending on your type of water heater.
Regularly flushing your water heater will help maintain its performance and extend its lifespan. It is recommended to flush your water heater annually or as advised by the manufacturer. By adhering to these simple steps, you can ensure that your water heater operates efficiently, providing you with ample hot water whenever you need it.

Tools and Materials Needed for Dip Tube Replacement and Flushing
Dip Tube Replacement Kit
The first item you’ll need is a dip tube replacement kit. This kit includes all the necessary components to successfully replace your dip tube and ensure proper functioning of your ice cream machine.
Garden Hose
Next, you’ll need a garden hose. This will be used to flush out any debris or buildup that may be clogging your dip tube. It’s important to use a hose with a strong stream of water to effectively clean the tube.
Bucket
You’ll also need a bucket to catch the water and debris as it flushes out of the dip tube. This will prevent any mess and make the cleaning process easier.
Screwdriver
A screwdriver will be necessary to remove any screws or fasteners that are holding the dip tube in place. Make sure to choose the appropriate size and type of screwdriver for your specific machine.
Adjustable Wrench
An adjustable wrench will be needed to loosen and tighten any nuts or bolts that are securing the dip tube. This tool will ensure a secure fit and prevent any leaks or malfunctions.
| Tool/Material | Description |
|---|---|
| Dip Tube Replacement Kit | A kit containing all the necessary components for dip tube replacement |
| Garden Hose | A hose with a strong stream of water for flushing the dip tube |
| Bucket | A container for catching water and debris during the flushing process |
| Screwdriver | A tool for removing screws or fasteners holding the dip tube in place |
| Adjustable Wrench | A wrench for loosening and tightening nuts or bolts securing the dip tube |
Safety Precautions to Consider
In the realm of ensuring safety in your daily activities, it is crucial to take necessary precautions to protect yourself and others. In this section, we will discuss some important safety measures to consider when dealing with power and water supply, as well as handling hot water.
Turning off the Power and Water Supply
Prior to performing any maintenance or repair work, it is essential to turn off the power and water supply. This precautionary measure will help prevent any accidents or injuries that may occur due to electric shock or water leakage. Make sure to locate the main power switch and shut it off before proceeding with any work.
Using Protective Gear
Protective gear is an essential aspect of safety when working with power and water supplies. Ensure that you have the necessary gear, such as gloves, goggles, and boots, to protect yourself from any potential hazards. Wearing the proper protective gear will minimize the risk of injuries and ensure a safe working environment.
Handling Hot Water with Care
Hot water can cause severe burns if not handled with care. Always take precautions when dealing with hot water, especially when performing maintenance tasks, such as checking water heaters or plumbing systems. Use insulated gloves or tools to avoid direct contact with hot surfaces and always turn off the hot water supply before beginning any work.
| Precaution | Description |
|---|---|
| Turning off the Power and Water Supply | Before performing any maintenance or repair work, make sure to turn off the main power switch and water supply to avoid accidents or injuries. |
| Using Protective Gear | Wear protective gear, such as gloves, goggles, and boots, to protect yourself from potential hazards. |
| Handling Hot Water with Care | Take precautions when dealing with hot water to prevent burns. Use insulated gloves or tools and turn off the hot water supply before working. |
Bottom Line
Flushing your water heater is an essential step in maintaining its efficiency and prolonging its lifespan. It is especially important when replacing the dip tube, as sediment buildup can cause the new tube to fail prematurely. Flushing should be done annually, or more frequently if you have hard water or notice a decrease in hot water supply. It is a simple process that can be done by a homeowner or a professional plumber. By taking the time to flush your water heater and replace the dip tube, you can save money on energy bills and avoid costly repairs in the future.
Remember to follow safety precautions when flushing your water heater, such as turning off the power and gas supply, and allowing the water to cool before draining. If you are unsure about how to flush your water heater or replace the dip tube, consult a professional plumber for assistance. With proper maintenance, your water heater can provide reliable hot water for years to come.
Read More:
1. Diy Flushing For Water Heaters With Low Hot Water Pressure
2. How Does Flushing Impact Water Heater Corrosion Prevention?


