II. Flushing helps to remove sediment, minerals, and debris that can accumulate in the tank and cause damage to the heating elements, reduce efficiency, and even lead to leaks.
III. It is recommended to flush the unit at least once a year, or more frequently if the water in the area is particularly hard or if the unit is used frequently. It is also important to follow the manufacturer’s instructions and safety guidelines when performing the flushing process.
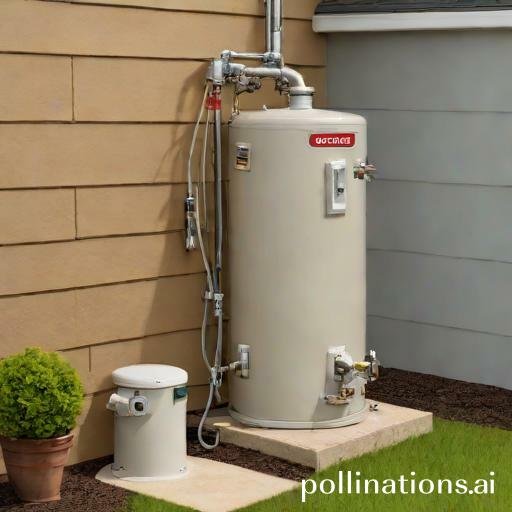
Flushing considerations for outdoor water heater units are important to maintain the efficiency and longevity of your system. Regular flushing helps to remove sediment and mineral buildup, ensuring optimal performance and preventing clogs.
By flushing your outdoor water heater, you can also prevent corrosion and extend the lifespan of the unit. With proper maintenance, you can enjoy reliable hot water supply and avoid costly repairs or replacements.
Keep your outdoor water heater running smoothly by complying with these flushing considerations.
When to Flush Your Outdoor Water Heater
1. Signs that your water heater needs flushing
Regular maintenance of your outdoor water heater is crucial to ensure its optimal performance and longevity. One important aspect of maintenance is flushing the system, which helps remove sediment and mineral buildup that can hinder its efficiency. Here are some signs that indicate your water heater needs flushing:
- Decreased hot water supply: If you notice a decrease in the amount of hot water available, it may be due to sediment buildup in your water heater. Flushing the system can help restore its capacity.
- Discolored water: If the hot water coming out of your faucets appears rusty or discolored, it could be a sign of sediment accumulation. Flushing the water heater can help improve the water quality.
- Strange noises: If you hear popping or rumbling sounds coming from your water heater, it may be an indication of sediment buildup. Flushing the system can eliminate these noises and prevent potential damage.
2. Recommended flushing frequency
To maintain the efficiency of your outdoor water heater, it is recommended to flush the system at least once a year. Albeit, the frequency may vary depending on the water quality in your area. If you live in an area with hard water or notice significant sediment buildup, you may need to flush the water heater more frequently.
Flushing your outdoor water heater not only improves its performance but also extends its lifespan. It is a simple yet effective maintenance task that can save you from costly repairs or replacements in the future. By regularly flushing your water heater, you can ensure a continuous supply of hot water and enjoy its benefits for years to come.
| Signs that your water heater needs flushing | Recommended flushing frequency |
|---|---|
| Decreased hot water supply | At least once a year |
| Discolored water | More frequently in areas with hard water |
| Strange noises |
Tools and Materials Needed for Flushing
Flushing is an important process that helps to maintain the efficiency and performance of various systems. Whether you are flushing a cooling system, a hydraulic system, or a plumbing system, it is essential to have the right tools and materials at hand. In this section, we will discuss the necessary equipment for a successful flushing operation.
1. Safety Equipment
Prioritizing safety is crucial when undertaking any flushing project. Here are some essential safety equipment items you should have:
- Protective Gloves: Use high-quality gloves to protect your hands from chemicals and other harmful substances.
- Safety Goggles: Safety goggles will shield your eyes from any splashes or debris during the flushing process.
- Protective Clothing: Wear appropriate clothing that covers your body to minimize exposure to any potential hazards.
- Respiratory Protection: Depending on the nature of the flushing operation, it may be necessary to use respiratory protection such as masks or respirators.
2. Required Tools and Materials
To ensure a smooth and effective flushing process, you will need the following tools and materials:
- Flushing Solution: Depending on the system being flushed, you may require a specific flushing solution or chemical. Consult the manufacturer’s guidelines for the appropriate solution.
- Flushing Pump: A reliable flushing pump is essential for circulating the flushing solution through the system. Choose a pump that is suitable for the size and type of system you are working on.
- Flushing Hoses: High-quality hoses are necessary to connect the flushing pump to the system. Ensure the hoses are compatible with the flushing solution and can withstand the required pressure.
- Flushing Adapters: Depending on the system’s design, you may need specific adapters or fittings to connect the flushing hoses securely.
- Flush Valves: Flush valves allow for controlled flushing and draining of the system. Make sure you have the appropriate valves for your system.
- Flushing Brushes: Use brushes with soft bristles to remove any debris or buildup during the flushing process. Different brush sizes may be required for various parts of the system.
- Measuring Instruments: Depending on the system, you may need measuring instruments such as pressure gauges or thermometers to monitor the flushing process accurately.
Steps for Flushing Your Outdoor Water Heater
Regular maintenance of your outdoor water heater is essential to ensure its optimal performance and longevity. Flushing the tank is a crucial step in this maintenance process. By maintaining these simple steps, you can effectively flush your outdoor water heater and keep it running smoothly:
1. Shutting off the power supply
Before beginning the flushing process, pivotal to turn off the power supply to the water heater. This will prevent any accidents or electrical issues during the procedure.
2. Draining the tank
Next, locate the drain valve on the bottom of the water heater and attach a hose to it. Place the other end of the hose in a suitable drainage area, such as a floor drain or outside. Open the drain valve and allow the water to flow out of the tank. This will remove any sediment or debris that has accumulated over time.
3. Flushing the tank
Once the tank is drained, close the drain valve and remove the hose. Fill the tank with cold water and add a cleaning solution specifically designed for flushing water heaters. Let the solution sit in the tank for the recommended amount of time, usually around 15-20 minutes. This will break down any remaining sediment or buildup inside the tank.
4. Refilling the tank
After the cleaning solution has done its job, open the cold water supply valve to refill the tank. Allow the water to flow through the tank and out of any faucets connected to the water heater. This will flush out any remaining residue from the cleaning solution.
5. Restarting the water heater
Once the tank is fully refilled, you can safely turn the power supply back on. Follow the manufacturer’s instructions to relight the pilot light or restart the heating mechanism. Check for any leaks or irregularities in the system before fully operating the water heater.
Troubleshooting Flushing Issues
Common problems and their solutions
Relating to flushing issues, there are several common problems that homeowners may encounter. These problems can range from a weak flush to a toilet that won’t flush at all. That being said, with the right solutions, these issues can often be easily resolved.
- Weak flush: If your toilet is experiencing a weak flush, it could be due to a clog in the drain pipe or a problem with the water level in the tank. To resolve this issue, try using a plunger to clear any clogs or adjust the water level in the tank if necessary.
- Toilet won’t flush: If your toilet won’t flush at all, it may be due to a problem with the flapper valve or the handle mechanism. Check to see if the flapper valve is sealing properly and adjust or replace it if necessary. Additionally, make sure that the handle mechanism is functioning correctly and adjust or replace it if needed.
- Overflowing toilet: An overflowing toilet can be a messy and unpleasant problem. This issue is often caused by a clog in the drain pipe or a problem with the float valve. To stop the overflow, you can try using a plunger to clear the clog or adjust the float valve to regulate the water level.
When to call a professional
Meanwhile many flushing issues can be resolved with simple solutions, there are times when it may be necessary to call a professional plumber. If you have tried troubleshooting the problem and are still experiencing flushing issues, it may be a sign of a more serious underlying problem. Additionally, if you are uncomfortable or unfamiliar with plumbing repairs, it is always best to seek the help of a professional to avoid causing further damage.
In regard to your toilet’s flushing function, pivotal to address any issues promptly to ensure proper functionality and prevent potential water damage. By obeying these troubleshooting tips and knowing when to call a professional, you can effectively resolve flushing issues and maintain a fully functioning toilet.
| Problem | Solution |
|---|---|
| Weak flush | Clear clogs or adjust water level |
| Toilet won’t flush | Check and adjust flapper valve or handle mechanism |
| Overflowing toilet | Clear clogs or adjust float valve |
Maintenance Tips for Your Outdoor Water Heater
1. Regular Inspection and Cleaning
Regular inspection and cleaning are essential for ensuring the optimal performance and longevity of your outdoor water heater. By conducting routine checks, you can identify any potential issues before they escalate into major problems.
During the inspection, pay close attention to the various components of the water heater, including the tank, valves, and pipes. Look for any signs of leaks, corrosion, or damage. If you notice any issues, address them promptly to prevent further damage.
Additionally, regular cleaning is necessary to remove sediment and debris that can accumulate inside the water heater over time. Sediment buildup can affect the efficiency of the heater and lead to decreased performance. Flushing the tank periodically can help remove sediment and keep your water heater running smoothly.
2. Replacing Faulty Parts
If you encounter any faulty parts during the inspection or notice a decline in the performance of your outdoor water heater, it is crucial to replace those parts promptly. Faulty components can impact the efficiency and safety of your water heater.
When replacing parts, ensure that you use high-quality replacements that are compatible with your specific water heater model. Consult the manufacturer’s guidelines or seek professional assistance if you are unsure about the right parts to use.
Common parts that may need replacement include thermostats, heating elements, and pressure relief valves. Regularly checking and replacing these parts can help maintain the optimal functioning of your outdoor water heater.
Table: Outdoor Water Heater Maintenance Checklist
| Inspection & Cleaning | Replacement of Faulty Parts |
|---|---|
|
|
Bottom Line
Relating to outdoor water heater units, proper flushing is essential for maintaining optimal performance and extending the lifespan of the unit. Neglecting to flush the unit can lead to sediment buildup, corrosion, and reduced efficiency. It is recommended to flush the unit at least once a year, or more frequently if the water in your area is particularly hard or contains high levels of minerals. Flushing the unit is a simple process that can be done with basic tools and a garden hose. By taking the time to flush your outdoor water heater unit regularly, you can ensure that it continues to provide reliable hot water for years to come.
Overall, maintaining your outdoor water heater unit is an important part of home maintenance. Flushing the unit is just one of the many steps you can take to keep your water heater running smoothly and efficiently. By adhering to these simple tips, you can avoid costly repairs and replacements down the line, and enjoy hot water whenever you need it.
Read More:
1. Flushing For Improved Water Heater Dip Tube Replacement
2. Diy Flushing Tips For Water Heaters In Cold Climates


