II. Flushing a water heater involves turning off the power or gas supply, attaching a hose to the drain valve, and draining the tank until the water runs clear.
III. DIY flushing can save homeowners money and extend the lifespan of their water heater, but it is important to follow safety precautions and manufacturer guidelines to avoid damage or injury.
This technical documentation is a DIY flushing guide for tank-style water heaters. It provides step-by-step instructions on how to flush your water heater to prevent sediment buildup and ensure optimal performance.
The guide includes safety precautions, necessary tools, and tips on how often to flush your tank. By conforming to this guide, you can extend the life of your water heater and save money on energy bills.
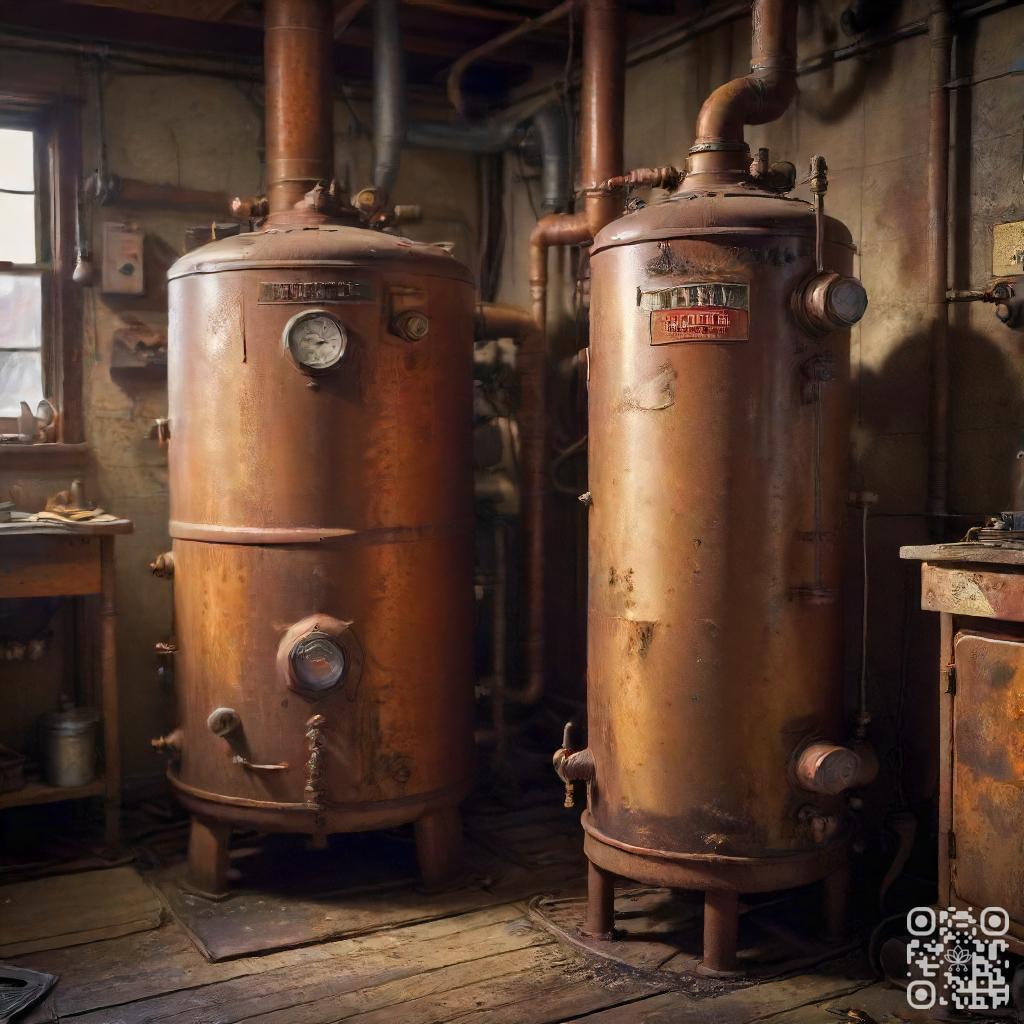
Discerning Tank-Style Water Heaters
1. How tank-style water heaters work
Tank-style water heaters are a popular choice for homes and businesses as they provide a reliable and efficient way to heat water. These water heaters consist of a large tank that stores and heats the water. When you turn on the hot water tap, cold water enters the tank through a dip tube, which ensures that the water is evenly distributed. Inside the tank, there is a heating element or a gas burner that heats the water to the desired temperature. Once the water reaches the set temperature, it is ready for use.
One key advantage of tank-style water heaters is that they can provide a continuous supply of hot water. The tank stores a certain amount of hot water, which can be readily available whenever you need it. Despite this, fundamental to note that the capacity of the tank determines how much hot water can be used at once. If the demand exceeds the tank’s capacity, you may experience a temporary reduction in hot water availability.
2. Common problems with tank-style water heaters
In the course of tank-style water heaters are generally reliable, they can experience certain issues that may require attention. One common problem is sediment buildup in the tank. Over time, minerals and other debris can accumulate at the bottom of the tank, affecting its efficiency and lifespan. Regular maintenance, such as flushing the tank to remove sediment, can help prevent this issue.
Another common problem is a malfunctioning heating element or gas burner. If the water is not heating properly, it could be due to a faulty heating component. In such cases, it is recommended to seek professional assistance to diagnose and fix the problem.
Leaks are also a potential issue with tank-style water heaters. A leak may indicate a problem with the tank itself or a faulty valve. Fundamental to address leaks promptly to prevent water damage and further complications.
| Problem | Possible Cause | Solution |
|---|---|---|
| Sediment buildup | Mineral accumulation | Regular tank flushing |
| Heating issues | Malfunctioning heating element or gas burner | Professional repair |
| Leaks | Problem with tank or faulty valve | Promptly address and fix the issue |
These are just a few examples of the common problems encountered with tank-style water heaters. It is always recommended to consult a professional for proper diagnosis and repair to ensure the longevity and efficient operation of your water heater.
When to Flush a Tank-Style Water Heater
Regular maintenance is crucial to ensure the optimal performance and longevity of your tank-style water heater. One essential aspect of maintenance is flushing the tank periodically. By flushing your water heater, you can prevent sediment buildup and augment its efficiency. In this section, we will probe the signs that indicate the need for flushing and the recommended flushing frequency.
1. Signs that indicate the need for flushing
- Discolored water: If you notice rusty or murky water coming from your hot water taps, it is a clear indication that sediment has accumulated in your tank. Flushing the tank will help eliminate this sediment and restore clear water.
- Strange noises: Sediment buildup can result in popping or rumbling sounds coming from your water heater. These noises occur when the sediment comes into contact with the heating element. Flushing the tank will remove the sediment and eliminate these sounds.
- Reduced hot water supply: Sediment accumulation can also reduce the amount of hot water your heater can produce. If you find that your hot water supply is not as ample as it used to be, flushing the tank can help restore its capacity.
2. Recommended flushing frequency
The frequency at which you should flush your tank-style water heater depends on various factors, including the quality of your water and the usage patterns in your household. Generally, it is recommended to flush the tank at least once a year to maintain optimal performance.
If you live in an area with hard water or notice signs of sediment buildup, more frequent flushing may be necessary. Consulting a professional plumber can help you determine the ideal flushing frequency based on your specific circumstances.
Steps for Flushing Tank-Style Water Heaters
1. Required Tools and Materials
Before you start flushing your tank-style water heater, make sure you have the following tools and materials:
- A garden hose
- A bucket
- A screwdriver
- A pair of pliers
- A wrench
- A towel or rag
- A vinegar solution or a descaling agent
2. Step-by-Step Instructions for Flushing
Follow these simple steps to flush your tank-style water heater:
Step 1: Turn off the Power
Before you begin, ensure that the power to the water heater is turned off. This is crucial for your safety.
Step 2: Shut off the Water Supply
Locate the cold water supply valve, usually located on top of the water heater, and turn it off.
Step 3: Attach the Garden Hose
Connect one end of the garden hose to the drain valve at the bottom of the water heater and place the other end in a suitable drainage location.
Step 4: Open the Pressure Relief Valve
Open the pressure relief valve on the water heater to allow air into the tank and facilitate draining.
Step 5: Drain the Tank
Slowly open the drain valve to allow the water to flow out of the tank. Be cautious as the water may be hot.
Step 6: Flush the Tank
Once the tank is empty, close the drain valve and turn on the cold water supply. Allow the water to run through the tank and out of the garden hose for a few minutes to flush out any sediment or mineral buildup.
Step 7: Repeat if Necessary
If the water is still discolored or contains sediment, you may need to repeat the flushing process.
Step 8: Refill the Tank
Once the water runs clear, close the drain valve and turn off the pressure relief valve. Remove the garden hose and securely tighten the drain valve.
Step 9: Turn on the Power
Finally, turn on the power to the water heater and wait for it to heat up the freshly flushed water.

Tips for DIY Flushing
Flushing is an important task that helps maintain the efficiency and functionality of various systems. Whether you are flushing your car’s cooling system or your home’s plumbing, it is crucial to follow certain precautions and best practices to ensure a successful and effective flush. In this section, we will provide you with valuable tips and guidance for DIY flushing.
Precautions to take before flushing
- Protective Gear: Before starting any flushing procedure, make sure to wear appropriate protective gear such as gloves and goggles. This will safeguard you from any potential harm or exposure to harmful substances.
- Read the Instructions: Familiarize yourself with the manufacturer’s instructions and guidelines for the specific system you are flushing. This will help you understand the process better and avoid any potential mistakes.
- Turn Off Power: If you are flushing a system that is connected to electricity, such as a water heater, make sure to turn off the power supply before proceeding. This will prevent any electrical accidents or damage.
Best practices for effective flushing
- Flush in the Right Direction: Always flush in the direction recommended by the manufacturer or the system’s design. This will ensure that any unwanted debris or buildup is effectively removed.
- Use the Right Tools: Make sure to use the appropriate tools for the flushing task at hand. This may include flushing kits, specialized cleaning solutions, or flushing agents. Using the right tools will intensify the effectiveness of the flush.
- Flush Regularly: Regular flushing helps prevent the accumulation of sediment or deposits, which can lead to reduced efficiency or even system failure. Make it a part of your maintenance routine to flush your systems periodically.
| Tip | Description |
|---|---|
| Protective Gear | Wear gloves and goggles to protect yourself from harm or exposure to harmful substances. |
| Read the Instructions | Familiarize yourself with the manufacturer’s guidelines for the specific system you are flushing. |
| Turn Off Power | Before flushing a system connected to electricity, such as a water heater, turn off the power supply. |
| Flush in the Right Direction | Always flush in the direction recommended by the manufacturer or the system’s design. |
| Use the Right Tools | Ensure you have the appropriate tools for the flushing task, such as flushing kits or specialized cleaning solutions. |
| Flush Regularly | Make flushing a regular part of your maintenance routine to prevent sediment accumulation and maintain system efficiency. |
Troubleshooting Common Flushing Issues
1. Low hot water pressure
Low hot water pressure can be a frustrating issue to deal with, especially when you’re expecting a strong and steady flow of hot water. Fortunately, there are a few common causes and solutions for this problem.
1.1 Clogged pipes
One possible cause of low hot water pressure is clogged pipes. Over time, mineral deposits and debris can accumulate in the pipes, restricting the flow of water. To resolve this issue, you can try flushing the pipes by turning off the water supply, opening the faucets, and allowing the water to run for a few minutes. This can help dislodge any obstructions and improve the water pressure.
1.2 Malfunctioning water heater
Another potential cause of low hot water pressure is a malfunctioning water heater. If the heating element or thermostat in your water heater is faulty, it can affect the performance of the system and result in reduced water pressure. In such cases, it is advisable to call a professional plumber to inspect and repair the water heater.
2. Leaking water heater
A leaking water heater can not only be a nuisance but also indicate a more serious underlying problem. Here are a few steps you can take to address this issue.
2.1 Check for visible leaks
Start by visually inspecting your water heater for any visible leaks. Look for water pooling around the base of the heater or dripping from connections and valves. If you notice a leak, indispensable to take immediate action to prevent further damage.
2.2 Tighten connections
In some cases, a leaking water heater can be caused by loose or faulty connections. Use a wrench to check and tighten any loose connections, such as the inlet and outlet pipes or the pressure relief valve. That being said, be cautious not to overtighten, as this can cause damage.
Bottom Line
Flushing your tank-style water heater is an essential maintenance task that can extend the life of your appliance and improve its efficiency. With the right tools and a little bit of know-how, you can easily perform this task yourself and save money on professional services. Remember to turn off the power and water supply before starting, and follow the manufacturer’s instructions for your specific model. Flushing your water heater once a year is recommended, but you may need to do it more frequently if you have hard water or notice sediment buildup. Regular flushing can prevent costly repairs and ensure that your water heater is running smoothly for years to come.
By complying with this DIY flushing guide, you can keep your tank-style water heater in top condition and avoid the inconvenience of a cold shower or a malfunctioning appliance. Don’t neglect this important maintenance task – take the time to flush your water heater today and enjoy reliable hot water for years to come.
Read More:
1. Flushing For Extended Water Heater Lifespan
2. What Precautions Should I Take Post-Flushing?


