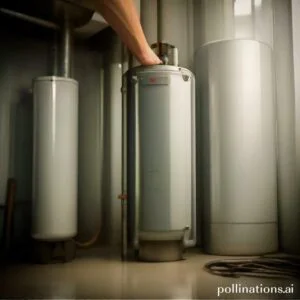
II. While it is possible to flush a water heater without a hose, it is not recommended as it can be messy and potentially dangerous.
III. To properly flush a water heater, it is best to use a hose and follow the manufacturer’s instructions carefully to ensure safe and effective results.
If you’re wondering whether you can flush your water heater without a hose, the short answer is no. Flushing your water heater is an essential maintenance task that helps remove sediment buildup, which can affect its efficiency and lifespan.
Despite this, you’ll need a hose to do it properly. In this article, we’ll explain why you need a hose and provide a step-by-step guide on how to flush your water heater.
Preparation: Tools and Materials Needed for Flushing Your Water Heater
1. Safety Precautions Before You Begin
Flushing your water heater is an important maintenance task that helps prolong its lifespan and ensure efficient operation. Conversely, it’s crucial to take necessary safety precautions before starting the process to avoid any accidents or injuries.
Some important safety measures to consider include:
- Turning off the power supply: Before you begin, make sure to turn off the electricity or gas supply to your water heater. This will prevent any potential electrical shocks or gas leaks during the flushing process.
- Allowing the water to cool: Hot water can cause burns, so it’s essential to allow the water in the heater to cool down before proceeding with the flushing. This will minimize the risk of scalding.
- Using protective gear: Wear gloves, safety goggles, and protective clothing to shield yourself from any splashing water or debris during the flushing process.
2. Tools Required for Flushing Your Water Heater
To successfully flush your water heater, you will need the following tools:
| Tool | Description |
|---|---|
| Adjustable wrench | A tool used to loosen and tighten the drain valve and other connections on the water heater. |
| Garden hose | A hose that will be connected to the drain valve to allow the water to flow out of the heater. |
| Bucket or drain pan | A container to collect the flushed water and prevent any mess. |
3. Materials Needed for Flushing Your Water Heater
In addition to the necessary tools, you will also need the following materials:
- Vinegar or descaling agent: This will help remove mineral deposits and sediment buildup inside the water heater tank.
- Teflon tape: Used to secure the connections and prevent any leaks after flushing.
- Clean cloth or sponge: To wipe off any spills or excess water during the process.
Step-by-Step Guide: How to Flush Your Water Heater
Flushing your water heater regularly is essential to maintain its efficiency and prolong its lifespan. Follow this step-by-step guide to ensure your water heater functions optimally:
1. Turn Off the Power Supply or Gas Valve
Prior to starting the flushing process, it is crucial to turn off the power supply or gas valve of your water heater. This step ensures your safety and prevents any accidents.
2. Turn Off the Cold Water Supply
Locate the cold water supply valve connected to your water heater and turn it off. This valve controls the flow of water into the tank and must be closed before proceeding.
3. Drain the Water Heater Tank
Attach a hose to the drain valve located at the bottom of the water heater tank. Place the other end of the hose in a suitable drainage area or connect it to a bucket. Open the drain valve to let the water flow out of the tank completely.
4. Flush the Tank with Cold Water
Once the tank is drained, close the drain valve and turn on the cold water supply valve. This will allow fresh water to enter the tank and flush out any sediment or debris that may have accumulated over time. Let the water flow for a few minutes until it runs clear.
5. Refill the Tank and Turn the Power Supply or Gas Valve Back On
After flushing the tank, close the cold water supply valve. Open a hot water faucet in your home to release any trapped air. Once the tank is filled, turn on the power supply or gas valve to resume normal operation of your water heater.
Regularly flushing your water heater using this step-by-step guide will help maintain its efficiency, improve water quality, and prevent potential issues. Remember to follow safety precautions and consult a professional if you encounter any difficulties.
Maintenance: Tips for Maintaining Your Water Heater
Relating to your water heater, regular maintenance is key to ensuring its longevity and optimal performance. In this section, we will navigate some essential tips for maintaining your water heater to keep it running efficiently.
1. Regular Inspection of Your Water Heater
Inspecting your water heater on a regular basis is crucial to identify any potential issues early on. Start by checking for leaks or signs of corrosion around the tank and pipes. Additionally, pay attention to the temperature and pressure relief valve to ensure it is functioning properly. If you notice any abnormalities or suspect a problem, it is recommended to contact a professional technician for further evaluation.
2. Annual Maintenance of Your Water Heater
Performing annual maintenance on your water heater can significantly extend its lifespan. Start by flushing the tank to remove sediment buildup, which can affect its efficiency. This can be done by attaching a garden hose to the drain valve and allowing the water to flow until it runs clear. Next, check the anode rod, which helps prevent corrosion within the tank. If it is significantly corroded, it may need to be replaced. In closing, inspect the burner and clean any accumulated debris to ensure proper heating.
3. Replacing Your Water Heater When Necessary
Even with regular maintenance, there may come a time when replacing your water heater is necessary. Signs that indicate it may be time for a replacement include frequent repairs, decreased efficiency, and age. Most water heaters have a lifespan of around 8-12 years, so if yours is approaching or surpassing this range, it is wise to start considering a replacement. When choosing a new water heater, consider energy-efficient options that can help reduce your utility bills in the long run.
Troubleshooting: Common Problems and Solutions
1. No Hot Water
If you find yourself without hot water, it can be quite a frustrating experience. There are several potential reasons for this issue. First, check if the pilot light is lit. If it’s not, follow the manufacturer’s instructions to relight it. Another possible cause could be a faulty thermostat. In this case, you may need to replace it to restore hot water. Additionally, sediment buildup in the tank can also lead to insufficient heating. Regularly draining and flushing the tank can help prevent this problem.
2. Leaking Water Heater
A leaking water heater can cause significant damage if not addressed promptly. One common cause of leaks is a faulty temperature and pressure relief valve. Try operating the valve manually to see if it releases any water. If not, it may need to be replaced. Another possible reason for a leak is a loose or damaged drain valve. Tightening or replacing the valve can often resolve the issue. Despite this, if the tank itself is leaking, it may be necessary to replace the entire water heater.
3. Strange Noises Coming from Your Water Heater
If you notice unusual noises coming from your water heater, it could indicate a problem. One common cause is sediment buildup at the bottom of the tank, which can create popping or rumbling sounds. Flushing the tank regularly can help prevent this. Another possible reason for strange noises is a faulty heating element. In this case, you may need to replace the element to eliminate the noise. If the noises persist or become louder, it’s best to consult a professional plumber for further inspection and assistance.
| Problem | Solution |
|---|---|
| No Hot Water | Check pilot light, replace thermostat, drain and flush tank |
| Leaking Water Heater | Check temperature and pressure relief valve, tighten or replace drain valve, consider tank replacement |
| Strange Noises | Flush tank, replace heating element, seek professional assistance if needed |

Cost: How Much Does It Cost to Flush Your Water Heater?
Flushing your water heater regularly is essential for maintaining its efficiency and prolonging its lifespan. But how much does it cost to perform this crucial maintenance task? Let’s pioneer the costs associated with flushing your water heater.
1. DIY vs. Professional Flushing Costs
Relating to flushing your water heater, you have two options: doing it yourself or hiring a professional. DIY flushing is a cost-effective choice as it only requires minimal supplies, such as a hose and a bucket. Nonetheless, hiring a professional plumber for the job may incur additional costs, but it ensures a thorough and efficient flushing process.
2. Factors that Affect the Cost of Flushing Your Water Heater
Several factors can influence the cost of flushing your water heater. These include:
- Type of Water Heater: The cost may vary depending on whether you have a gas or electric water heater.
- Size of the Water Heater: Larger water heaters may require more time and resources to flush, resulting in higher costs.
- Location: The cost can also vary based on your geographical location and local service charges.
- Additional Repairs: If your water heater requires any repairs or maintenance during the flushing process, it may add to the overall cost.
3. Cost Comparison of Flushing vs. Replacing Your Water Heater
Regular flushing is a cost-effective maintenance measure that can help extend the lifespan of your water heater. That being said, if your water heater is old, inefficient, or experiencing significant issues, it might be more cost-effective to consider replacing it instead of flushing. The cost of a new water heater installation will depend on various factors, including the type and size of the unit.
| Cost Factors | DIY Flushing | Professional Flushing |
|---|---|---|
| Supplies | Minimal | N/A |
| Service Charges | N/A | Varies |
| Additional Repairs | N/A | Possible |
| Water Heater Replacement | N/A | Consideration |
Bottom Line
Flushing your water heater is an essential maintenance task that helps to prolong its lifespan and ensure it operates efficiently. In the course of it is possible to flush your water heater without a hose, it is not recommended. A hose is necessary to drain the tank completely and prevent any sediment or debris from clogging the drain valve. Additionally, using a hose allows you to direct the water to a safe location and avoid any potential damage to your home or property. Therefore, it is best to use a hose when flushing your water heater to ensure a thorough and safe cleaning process.
Regularly flushing your water heater with a hose can help to prevent costly repairs and replacements in the future. By removing sediment and debris from the tank, you can improve its efficiency and extend its lifespan. So, if you haven’t flushed your water heater recently, it’s time to grab a hose and get to work!
Read More:
1. How Does Sediment Affect Water Heater Flushing?
2. What Is The Cost Of Professional Water Heater Flushing?
