II. DIY testing the effectiveness of anode rods involves draining the water heater, removing the anode rod, and inspecting it for signs of wear and tear.
III. Regularly testing and replacing anode rods can extend the life of a water heater and save homeowners money on costly repairs or replacements.
Anode rods play a crucial role in preventing corrosion in water heaters, but fundamental to regularly check their effectiveness. By conducting your own tests, you can ensure the longevity and efficiency of your water heater.
This article will provide step-by-step instructions on how to test anode rods and determine if they need to be replaced. By assimilating the importance of anode rods and knowing how to test them, you can save money and extend the lifespan of your water heater.
Preparation
Before beginning any work on your water heater, fundamental to gather the necessary tools and materials. This will ensure that you have everything you need to complete the task efficiently and effectively.
1. Gather necessary tools and materials
Make sure you have the following items on hand:
| Tools | Materials |
| – Adjustable wrench | – Garden hose |
| – Screwdriver | – Bucket |
| – Pipe cutter | – Teflon tape |
2. Turn off power supply to water heater
Prior to draining the water heater, it is crucial to turn off the power supply. This will prevent any accidents or damage from occurring whilst you work on the unit.
To turn off the power:
- Locate the circuit breaker or fuse box for your water heater.
- Identify the specific breaker or fuse that controls the water heater.
- Switch off the breaker or remove the fuse to cut off the power supply.
3. Drain the water heater
Draining the water heater is an essential step in its maintenance. This process helps remove sediment and mineral buildup, ensuring optimal performance and prolonging the lifespan of the unit.
To drain the water heater:
- Attach a garden hose to the drain valve located at the bottom of the tank.
- Place the other end of the hose in a suitable drainage location, such as a floor drain or outside.
- Open the drain valve by turning it counterclockwise.
- Allow the water to flow out of the tank until it runs clear.
- Once the water is clear, close the drain valve by turning it clockwise.
Removing the Anode Rod
1. Locate the anode rod
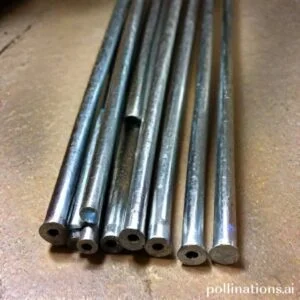
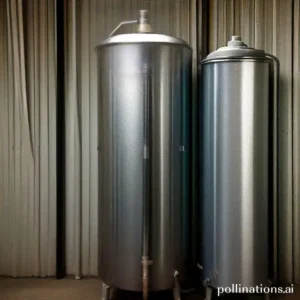
To remove the anode rod from your water heater, you first need to locate it. The anode rod is typically located on the top of the water heater and can be easily identified by its hexagonal shape.
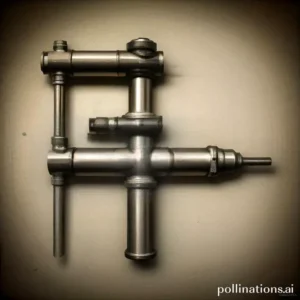
2. Use a socket wrench to remove the anode rod
Once you have located the anode rod, you will need to use a socket wrench to remove it. Insert the socket wrench into the hexagonal head of the anode rod and turn it counterclockwise to loosen and remove the rod.
3. Inspect the anode rod for signs of wear and tear
After removing the anode rod, take a closer look at it to inspect for any signs of wear and tear. Check for corrosion or pitting on the rod’s surface, as this indicates that it has been protecting your water heater from rust and needs to be replaced.
Testing the Anode Rod
The anode rod is a vital component of any water heater, as it helps prevent corrosion within the tank. To ensure that the anode rod is functioning properly, essential to conduct regular tests. This section will guide you through the process of testing the anode rod, providing you with valuable information to maintain the longevity of your water heater.
1. Use a multimeter to test the anode rod
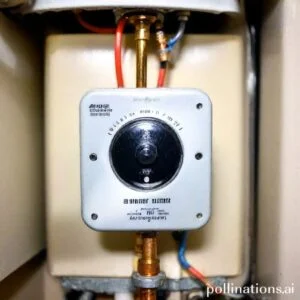
The first step in testing the anode rod is to use a multimeter, a versatile tool used to measure electrical voltage. Start by turning off the power supply to the water heater to ensure your safety. Then, locate the anode rod, which is typically located on top of the water heater tank. Use the multimeter to measure the voltage of the anode rod.
2. Determine the voltage reading
Once you have measured the voltage of the anode rod, record the reading. The voltage reading will indicate the level of corrosion on the anode rod. A higher voltage reading suggests that the anode rod is still in good condition, whilst a lower voltage reading may indicate that the anode rod needs to be replaced.
3. Compare the reading to the manufacturer’s specifications
In order to determine whether the anode rod needs to be replaced, compare the voltage reading to the manufacturer’s specifications. These specifications can usually be found in the water heater’s manual or on the manufacturer’s website. If the voltage reading is below the recommended range, it is likely time to replace the anode rod.
Regularly testing the anode rod is essential to maintain the efficiency and longevity of your water heater. By upholding these simple steps and comparing the voltage reading to the manufacturer’s specifications, you can ensure that your anode rod is in good working condition, protecting your water heater from corrosion and extending its lifespan.

Replacing the Anode Rod
In order to maintain the efficiency and longevity of your water heater, indispensable to periodically replace the anode rod. This simple maintenance task can greatly extend the lifespan of your water heater and prevent costly repairs in the future.
1. Purchase a new anode rod
The first step in replacing the anode rod is to purchase a new one. Anode rods are readily available at most hardware stores and online retailers. Fundamental to choose an anode rod that is compatible with your specific water heater model.
2. Apply Teflon tape to the threads of the new anode rod
Before installing the new anode rod, vital to apply Teflon tape to the threads. This will create a watertight seal and prevent leaks. Simply wrap the Teflon tape clockwise around the threads of the anode rod, ensuring that the tape is securely in place.
3. Install the new anode rod using a socket wrench
Once the Teflon tape is applied, it is time to install the new anode rod. Using a socket wrench, carefully thread the new anode rod into the water heater tank. Be sure to tighten the rod securely, but do not overtighten as this could cause damage to the tank.

Maintenance Tips
Regular maintenance is essential to ensure the longevity and efficient operation of your water heater. By adhering to these maintenance tips, you can prevent issues and extend the lifespan of your unit.
1. Check the anode rod annually
The anode rod is a crucial component that helps prevent corrosion inside the water heater tank. Over time, the anode rod can become depleted and should be checked annually. If the rod is heavily corroded or worn out, it should be replaced to protect the tank from rusting.
2. Flush the water heater regularly
Sediment and mineral buildup can accumulate at the bottom of the water heater tank, reducing its efficiency and potentially causing damage. Flushing the water heater regularly helps remove these deposits and ensures optimal performance. Consult your manufacturer’s instructions for the recommended frequency of flushing.
3. Consider installing a powered anode rod for increased longevity
A powered anode rod is a modern alternative to traditional sacrificial anode rods. It uses electrical currents to generate ions that help prevent corrosion within the tank. Installing a powered anode rod can significantly extend the lifespan of your water heater and provide added protection against rust and deterioration.
| Maintenance Tips |
|---|
| Check the anode rod annually |
| Flush the water heater regularly |
| Consider installing a powered anode rod for increased longevity |
Bottom Line
DIY testing the effectiveness of anode rod is a simple and cost-effective way to ensure the longevity of your water heater. Regular testing and replacement of anode rods can prevent corrosion and extend the life of your water heater. Imperative to follow the manufacturer’s instructions and safety precautions when testing and replacing anode rods. If you are unsure about the process, it is best to consult a professional plumber. By taking the time to test and replace anode rods, you can save money on costly repairs and replacements in the long run.
Overall, DIY testing of anode rods is a crucial step in maintaining the efficiency and longevity of your water heater. It is a simple process that can be done at home with minimal tools and expertise. By making this a regular part of your home maintenance routine, you can ensure that your water heater continues to provide hot water for years to come.
Read More:
1. Compatibility Of Aluminum Anode Rod With Hard Water
2. Anode Rod Maintenance Tips For Tankless Water Heaters