II. DIY anode rod replacement can save homeowners money on costly repairs and maintenance fees.
III. It is important to follow professional guidance when replacing anode rods to ensure safety and proper installation.
Are you tired of paying for expensive professional services? With our DIY anode rod replacement guide, you can save money and easily replace your anode rod yourself.
Our professional guidance will walk you through the step-by-step process, ensuring that you have all the information you need to successfully complete the replacement. Say goodbye to costly repairs and hello to a functional water heater.
Don’t miss out on this opportunity to save money and gain valuable knowledge. Get started with our DIY anode rod replacement guide today!
Gather Tools and Materials
1. Required tools for anode rod replacement
As for replacing the anode rod in your water heater, having the right tools is essential for a successful and efficient replacement process. Here are the necessary tools you will need:
- Wrench: A wrench will be needed to loosen and tighten the anode rod.
- Teflon tape: Teflon tape is used to seal the threads of the new anode rod to prevent leaks.
- Plumbers tape: Plumbers tape can be used to seal the threads of the water heater’s inlet and outlet connections.
- Bucket: A bucket will come in handy to catch any water that may leak out during the replacement process.
2. Materials needed for the replacement process
In addition to the necessary tools, you will also need specific materials to ensure a successful anode rod replacement. Here are the materials you should gather:
- New anode rod: The most important material you will need is a new anode rod. Make sure to choose the correct type and size for your water heater.
- Thread sealant: Thread sealant is used to create a watertight seal between the anode rod and the water heater’s inlet and outlet connections.
- Owner’s manual: It is always helpful to have the water heater’s owner’s manual on hand to reference specific instructions and guidelines.
| Required Tools | Materials Needed |
|---|---|
| Wrench | New anode rod |
| Teflon tape | Thread sealant |
| Plumbers tape | Owner’s manual |
| Bucket |
Turn Off the Power and Water Supply
Pertaining to performing maintenance on your water heater, one crucial step is to turn off both the power and water supply. By abiding by these simple instructions, you can ensure your safety and prevent any potential damage to your water heater.
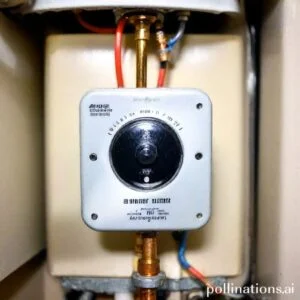
1. Shutting off the power supply to the water heater
Before you begin any work on your water heater, it is essential to shut off the power supply. This will protect you from any electrical hazards and ensure that you can safely perform the necessary tasks.
To shut off the power supply, locate the circuit breaker or fuse box that controls your water heater. Find the corresponding breaker or fuse and switch it off. This will cut off the electricity to your water heater, preventing any accidents or injuries.
2. Turning off the water supply to the water heater
In addition to shutting off the power supply, you also need to turn off the water supply to your water heater. This step is crucial to prevent any water leaks or damage whilst you are working on the unit.
Locate the main water shut-off valve, which is usually located near the water meter or where the main water line enters your home. Turn the valve clockwise to shut off the water supply. This will stop the flow of water to your water heater and allow you to safely perform maintenance tasks.
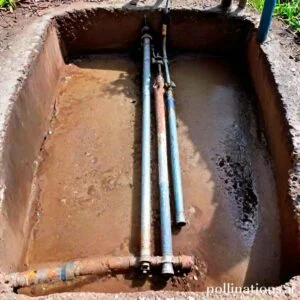
Drain the Tank
In regard to maintaining your water heater, one important task is draining the tank to access the anode rod. This simple process can help extend the lifespan of your water heater and ensure it continues to perform at its best.
1. Draining the tank to access the anode rod
Draining the tank is a crucial step in accessing the anode rod. This rod plays a vital role in preventing corrosion inside the tank. Over time, the anode rod can become depleted and may need to be replaced. By draining the tank, you can easily access the anode rod and inspect its condition.
- Step 1: Turn off the power supply to the water heater.
- Step 2: Locate the drain valve at the bottom of the tank.
- Step 3: Attach a hose to the drain valve and place the other end in a suitable drainage area.
- Step 4: Open the drain valve and allow the water to flow out of the tank.
- Step 5: Once the tank is fully drained, you can safely remove the anode rod for inspection or replacement.
2. Flushing the tank for better performance
In addition to accessing the anode rod, draining the tank also allows for flushing the tank, which can help improve its overall performance. Over time, sediment and mineral buildup can accumulate at the bottom of the tank, affecting its efficiency.
- Step 1: Once the tank is drained, close the drain valve.
- Step 2: Open the cold water supply valve to allow water to fill the tank.
- Step 3: Let the water flow into the tank for a few minutes and then turn off the cold water supply valve.
- Step 4: Open the drain valve again and allow the water to flush out any remaining sediment or debris.
- Step 5: Repeat this process a few times until the water runs clear.
Remove the Old Anode Rod
In regard to maintaining your water heater, one important task is to periodically replace the anode rod. This small but crucial component plays a vital role in preventing corrosion in your water heater and extending its lifespan. In this section, we will guide you through the process of removing the old anode rod safely and effectively.
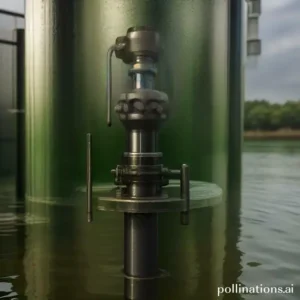
1. Locating the anode rod in the water heater
The first step in replacing the anode rod is to locate it within your water heater. The anode rod is typically located on the top of the water heater and can be accessed through a small opening or hatch. Integral to turn off the power supply to the water heater before proceeding with this task.
2. Removing the old anode rod safely
Once you have located the anode rod, it is time to remove the old one. Start by using a wrench or socket set to loosen the hexagonal head of the anode rod. Make sure to turn it counterclockwise. Some water heaters may require a bit of force to loosen the rod, so be prepared for a little resistance.
After loosening the anode rod, carefully pull it out of the water heater. Be cautious as the rod may be hot and can cause burns. Inspect the old rod for signs of corrosion or wear. If it is heavily corroded or worn out, it is definitely time for a replacement.
| Anode Rod Replacement | Professional Guidance |
|---|---|
| Step 1: Locate the anode rod | Step 1: Turn off power supply to the water heater |
| Step 2: Remove the old anode rod | Step 2: Use a wrench or socket set to loosen the hexagonal head |

Install the New Anode Rod
In the realm of maintaining your water heater, one important step is installing a new anode rod. This component plays a crucial role in preventing corrosion and extending the lifespan of your water heater. In this section, we will guide you through the process of installing a new anode rod, ensuring that your water heater continues to function optimally.
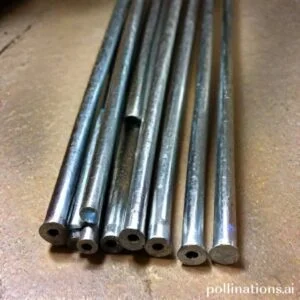
1. Choosing the Right Type of Anode Rod for Your Water Heater
The first step in installing a new anode rod is selecting the right type for your specific water heater. Anode rods are available in different materials, such as magnesium, aluminum, and zinc. Each material offers varying levels of protection against corrosion.
Consider factors such as water composition and the age of your water heater when choosing an anode rod. Consulting a professional or referring to the manufacturer’s guidelines can help you determine the most suitable type of anode rod for your water heater.
2. Installing the New Anode Rod in the Water Heater
Once you have chosen the appropriate anode rod, it’s time to install it in your water heater. Follow these steps:
- Step 1: Turn off the power supply to the water heater to ensure safety.
- Step 2: Locate the anode rod’s access port on top of the water heater.
- Step 3: Use a wrench to loosen and remove the old anode rod.
- Step 4: Insert the new anode rod into the access port and tighten it securely.
- Step 5: Turn on the power supply to the water heater.
To further elevate your assimilating of anode rods and their importance, refer to the table below:
| Anode Rod Material | Corrosion Protection Level |
|---|---|
| Magnesium | High |
| Aluminum | Moderate |
| Zinc | Low |
Bottom Line
Replacing an anode rod is a crucial task that should be done regularly to extend the lifespan of your water heater. In the course of it may seem like a daunting task, with the right tools and guidance, it can be a DIY project. In contrast, it’s important to follow the manufacturer’s instructions and safety precautions to avoid any accidents or damage to your water heater. If you’re not comfortable with DIY, it’s best to hire a professional plumber to do the job. A professional plumber can ensure that the anode rod is replaced correctly and can also inspect your water heater for any other issues. Remember, regular maintenance of your water heater can save you money in the long run by preventing costly repairs or replacements.
So, whether you choose to replace the anode rod yourself or hire a professional, make sure to prioritize this important maintenance task to keep your water heater running efficiently and effectively for years to come.
Read More:
1. Diy Anode Rod Replacement For Small Spaces
2. Anode Rod Lifespan Comparison: Titanium Vs. Aluminum