II. Step-by-step guide for DIY anode rod replacement, including necessary tools and safety precautions.
III. Tips for maintaining anode rods and scheduling regular replacements to avoid emergency situations in the future.
In emergency situations, it may be necessary to replace your anode rod yourself. This DIY method allows you to quickly and efficiently address the issue without the need for professional assistance.
By complying with a few simple steps, you can ensure that your water heater remains in optimal condition, preventing potential damage and extending its lifespan. This guide provides all the necessary information and tips to successfully replace your anode rod, saving you time and money.
Don’t let a faulty anode rod disrupt your daily routine – take matters into your own hands with this emergency DIY solution.
Signs of a Failing Anode Rod
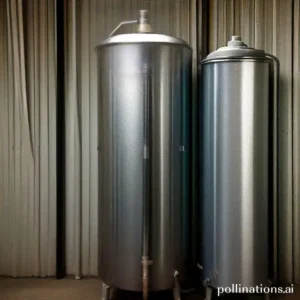
An anode rod is an essential component of a water heater that helps prevent corrosion. Over time, anode rods can deteriorate and fail, which can lead to various issues with your water heater. Here are some common signs that indicate a failing anode rod:
1. Decreased hot water supply
If you notice a decrease in the amount of hot water available, it could be a sign that your anode rod is failing. As the rod deteriorates, it becomes less effective at inhibiting corrosion, which can result in reduced hot water production.
2. Rusty water
Another indication of a failing anode rod is the presence of rusty water coming from your faucets. When the rod is no longer functioning properly, rust particles can mix with the water supply and give it a reddish or brownish tint.
3. Strange noises from the water heater
If you start hearing unusual noises, such as popping or banging sounds, coming from your water heater, it could be a sign of a failing anode rod. This happens because the rod’s deterioration can cause sediment buildup, leading to noisy water heater operation.
4. Foul odor from the water heater
A foul smell emanating from your water heater is another red flag that the anode rod may be failing. As the rod deteriorates, it can create a sulfur-like smell in the hot water, which can be unpleasant and indicate a need for replacement.
5. Visible corrosion on the anode rod
Finally, if you inspect the anode rod and notice visible corrosion or significant deterioration, it is a clear sign that the rod is failing. Corrosion on the rod’s surface indicates that it has been sacrificing itself to protect the water heater, and now it needs to be replaced.
Regular maintenance and timely replacement of the anode rod are crucial to ensure the longevity and efficient operation of your water heater. If you notice any of these signs, it’s recommended to consult a professional plumber who can assess the situation and provide the necessary repairs or replacements.
| Signs of a Failing Anode Rod |
|---|
| Decreased hot water supply |
| Rusty water |
| Strange noises from the water heater |
| Foul odor from the water heater |
| Visible corrosion on the anode rod |
Tools Required for DIY Replacement
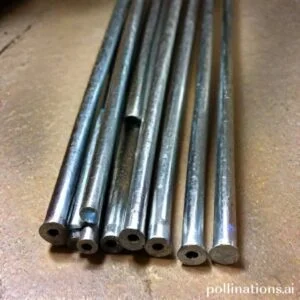
1. Anode rod
An anode rod is a crucial tool for DIY replacement of various components in your system. It helps prevent corrosion and extends the lifespan of your equipment. Made from magnesium or aluminum, the anode rod sacrifices itself to protect the tank from rusting. When replacing your anode rod, make sure to choose the right material based on your water quality.
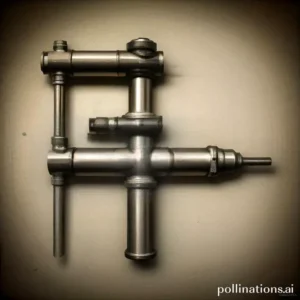
2. Socket wrench
A socket wrench is an essential tool for removing and installing nuts and bolts. It provides a secure grip and allows you to apply the necessary torque to loosen or tighten the connections. When selecting a socket wrench, opt for a set with various sizes to accommodate different fasteners in your system.
3. Teflon tape
Teflon tape, also known as plumber’s tape, is a versatile tool used to create a watertight seal between threaded pipe fittings. It helps prevent leaks and ensures a reliable connection. When applying Teflon tape, wrap it in a clockwise direction around the threads, ensuring a tight seal without overlapping.
4. Drainage hose
A drainage hose is essential for safely discharging water from your system. It allows you to direct the flow of water to a suitable drainage location. When choosing a drainage hose, ensure it has the appropriate diameter and length to accommodate your system’s requirements.
5. Screwdriver
A screwdriver is a versatile tool for various DIY tasks, including replacing components in your system. It helps loosen or tighten screws and provides leverage for efficient repairs. When selecting a screwdriver, consider getting a set with different types and sizes to handle different screw heads.
Steps for DIY Anode Rod Replacement
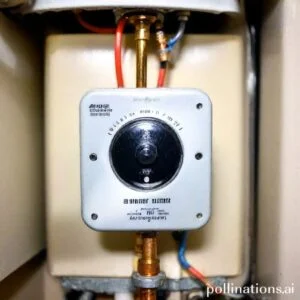
1. Turn off the power supply to the water heater
Before starting the anode rod replacement process, it is crucial to ensure your safety. Begin by turning off the power supply to the water heater. This will prevent any potential accidents or electrical hazards.
2. Turn off the water supply to the water heater
Next, you need to turn off the water supply to the water heater. This will prevent any water from flowing into the tank at the same time you are working on the anode rod replacement.
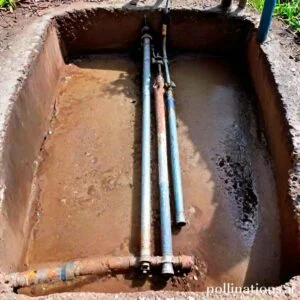
3. Drain the water from the tank
In order to access the anode rod, you need to drain the water from the tank. Attach a hose to the drain valve and let the water flow into a suitable drainage area. Make sure to open a hot water faucet to allow air into the tank for a faster drainage process.
4. Locate the anode rod
Now that the water is drained, you can locate the anode rod. It is usually located on top of the water heater and can be identified by its hexagonal shape.
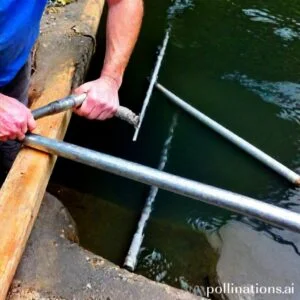
5. Remove the anode rod using a socket wrench
Using a socket wrench, carefully remove the anode rod by turning it counterclockwise. It may require some force, but be cautious not to damage any other components of the water heater.
6. Install the new anode rod
Once the old anode rod is removed, it’s time to install the new one. Insert the new anode rod into the opening and turn it clockwise until it is securely in place.
7. Apply Teflon tape to the threads
To ensure a tight seal, apply Teflon tape to the threads of the anode rod. This will prevent any leaks or drips once the water heater is back in operation.
8. Reconnect the water supply and power supply
Now that the new anode rod is installed, it’s time to reconnect the water supply and power supply. Turn on the water supply and check for any leaks. Then, restore the power supply to the water heater.
9. Refill the tank with water
After the connections are secure, it’s time to refill the tank with water. Close the drain valve and open the hot water faucet to allow air to escape as the tank fills up.
10. Test the water heater
Once the tank is full, it’s time to test the water heater. Turn on a hot water faucet and check if the water is heating up properly. If everything is working as expected, you have successfully replaced the anode rod.

Precautions to Take When Replacing Anode Rods
Replacing anode rods in your water tank is an important maintenance task that helps extend the life of your tank and ensures efficient performance. Notwithstanding, it’s crucial to take certain precautions to ensure your safety and the proper functioning of the tank. Here are some essential precautions to keep in mind:
1. Wear protective gear
Before starting the replacement process, make sure to wear the necessary protective gear. This includes gloves, safety goggles, and appropriate clothing to protect yourself from any potential hazards.
2. Be careful when draining the water from the tank
Prior to replacing the anode rod, you’ll need to drain the water from the tank. Take caution during this step as hot water and steam can cause burns. Use a hose or a drain valve to slowly and carefully drain the water, ensuring it doesn’t splash or cause any accidents.
3. Ensure the power supply is turned off before starting the replacement
Before working on the water tank, it’s crucial to turn off the power supply. This will prevent any electrical shocks or accidents during the replacement process. Locate the power switch or circuit breaker that controls the water heater and switch it off.
4. Use the right tools for the job
Having the proper tools is essential for a successful anode rod replacement. Make sure you have a wrench or socket set that fits the anode rod’s hex head. Using the wrong tools can lead to damage or improper installation, compromising the effectiveness of the anode rod.
5. Dispose of the old anode rod properly
Once you’ve successfully replaced the anode rod, it’s important to dispose of the old one correctly. Anode rods are usually made of materials that can be recycled, so check with your local recycling facility for proper disposal methods. Avoid throwing it in the regular trash as it can harm the environment.
| Precautions | Importance |
|---|---|
| Wear protective gear | To ensure personal safety |
| Be careful when draining the water from the tank | To prevent accidents and burns |
| Ensure the power supply is turned off before starting the replacement | To avoid electrical shocks |
| Use the right tools for the job | To ensure proper installation |
| Dispose of the old anode rod properly | To protect the environment |
When to Call a Professional
As for tackling home improvement projects, many individuals prefer the satisfaction of doing it themselves. Nonetheless, there are certain situations where it is best to seek the expertise of a professional. In this section, we will scrutinize the instances when it is advisable to call a professional for assistance with your water heater.
Lack of experience with DIY projects
If you are new to DIY projects or have limited experience, working on your water heater can be a daunting task. Water heaters are complex systems that require a certain level of knowledge and skill to handle effectively. Calling a professional ensures that the job is done correctly and minimizes the risk of further damage.
Inability to locate the anode rod
The anode rod is an essential component of a water heater as it helps prevent corrosion within the tank. Conversely, locating the anode rod can be challenging for those unfamiliar with water heater systems. A professional plumber will have the expertise to locate and assess the condition of the anode rod, ensuring proper maintenance and longevity of your water heater.
Complicated water heater systems
Some water heater systems can be highly complex, especially in larger properties or commercial buildings. These systems may have additional components, such as recirculation pumps or integrated solar panels. A professional plumber will have the knowledge and experience to navigate through these intricate systems, ensuring efficient and reliable operation.
Lack of necessary tools
Repairing or replacing certain parts of a water heater often requires specialized tools. If you do not have access to these tools, attempting the job yourself can be challenging and may result in further damage. Hiring a professional ensures that they have the necessary tools to complete the task safely and effectively.
Safety concerns
Working with water heaters can involve various safety risks, such as gas leaks or electrical hazards. Professionals are trained to handle these risks and take the necessary precautions to ensure their own safety and the safety of your property. Calling a professional plumber guarantees that the job is done in a safe and secure manner.
| Reasons to Call a Professional |
|---|
| Lack of experience with DIY projects |
| Inability to locate the anode rod |
| Complicated water heater systems |
| Lack of necessary tools |
| Safety concerns |
Bottom Line
Replacing an anode rod is an essential maintenance task for your water heater. In emergency situations, you can replace the anode rod yourself with the right tools and knowledge. Conversely, it is always recommended to seek professional help for a more permanent solution.
Regularly checking and replacing the anode rod can extend the life of your water heater and save you money in the long run. Don’t wait until it’s too late, keep an eye on your anode rod and replace it when necessary. With the right precautions and steps, you can DIY anode rod replacement in emergency situations and ensure your water heater is functioning properly.
Read More:
1. Diy Anode Rod Replacement Impact On Water Heater Lifespan
2. Anode Rod Maintenance For Off-Grid Living