II. Anode rods protect the water heater tank from corrosion and should be replaced every 3-5 years.
III. Proper safety precautions and tools are necessary for a successful anode rod replacement, including turning off the power supply and draining the tank before beginning the process.
In this DIY guide, we will traverse the process of replacing the anode rod in heat pump water heaters. By upholding these simple steps, you can amplify the performance and prolong the lifespan of your water heater.
We will discuss the importance of the anode rod, how to identify when it needs replacement, and provide a detailed walkthrough of the replacement process. With this knowledge, you can save money on professional repairs and ensure your heat pump water heater continues to provide efficient and reliable hot water.
Embracing Anode Rods
Anode rods are an essential component of heat pump water heaters, providing protection against corrosion and extending the lifespan of your water heater.
1. What is an anode rod?
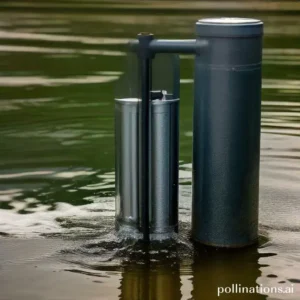
An anode rod is a metal rod typically made of magnesium or aluminum that is inserted into the water heater tank. Its purpose is to attract corrosive elements in the water, such as minerals and impurities, preventing them from attacking the tank and causing rust.
2. How does an anode rod work?
When the water heater is filled with water, the anode rod creates a chemical reaction known as electrolysis. This reaction causes the corrosive elements in the water to be attracted to the anode rod instead of the tank’s metal lining.
Over time, the anode rod will deteriorate due to the corrosive elements it attracts. Indispensable to check the condition of the anode rod regularly and replace it when it is significantly corroded.
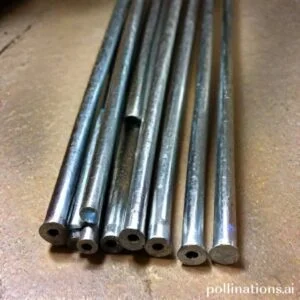
3. Types of anode rods for heat pump water heaters
There are two main types of anode rods commonly used for heat pump water heaters: magnesium and aluminum.
Magnesium anode rods are the most common and offer excellent protection against corrosion. They are recommended for areas with soft water or minimal mineral content.
Aluminum anode rods are a suitable alternative for areas with hard water or high mineral content. They provide effective protection and tend to last longer than magnesium rods.
It is essential to choose the right type of anode rod based on your water quality to ensure optimal protection for your heat pump water heater.
| Anode Rod Type | Recommended Water Quality |
|---|---|
| Magnesium | Soft water or minimal mineral content |
| Aluminum | Hard water or high mineral content |
Signs of a Worn Out Anode Rod
A worn out anode rod in a water heater can lead to various issues. Imperative to recognize the signs of a worn out anode rod so that you can address the problem promptly. Here are some common indicators:
1. Decreased hot water supply
One of the first signs of a worn out anode rod is a decrease in hot water supply. If you notice that your showers are getting colder or it takes longer for the water to heat up, it could be a sign that the anode rod needs to be replaced. The anode rod plays a crucial role in preventing corrosion in the water heater tank, so when it wears out, the tank becomes less efficient at heating the water.
2. Rusty water
Another sign of a worn out anode rod is rusty water coming out of your faucets. As the anode rod deteriorates, it can cause the water in the tank to become rusty. If you notice a reddish or brownish tint to your water, especially when you first turn on the tap, it’s likely that the anode rod needs to be replaced.
3. Unusual noises from the water heater
A worn out anode rod can also lead to unusual noises coming from the water heater. You may hear popping or banging sounds, especially when the water heater is heating up. These noises can indicate that the anode rod is no longer effectively protecting the tank from corrosion, causing sediment to build up and create the unusual sounds.
4. Corrosion on the water heater tank
If you notice corrosion on the water heater tank, it is a clear sign that the anode rod is worn out. The purpose of the anode rod is to attract corrosive elements in the water and sacrifice itself to protect the tank. When the anode rod is depleted, the tank becomes vulnerable to corrosion, leading to visible signs of rust or corrosion on its surface.
Imperative to address these signs of a worn out anode rod promptly to prevent further damage to your water heater. Consult a professional plumber to inspect and replace the anode rod if necessary. By maintaining a properly functioning anode rod, you can extend the lifespan of your water heater and ensure a reliable supply of hot water.
Steps for DIY Anode Rod Replacement
Replacing the anode rod in your water heater is an important maintenance task that helps prolong the lifespan of your appliance. Follow these steps to successfully replace the anode rod:
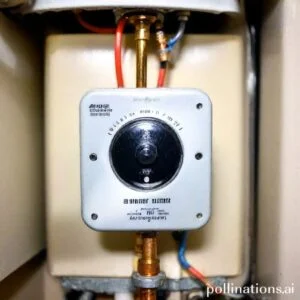
1. Turn off the power supply to the water heater
Before you begin any work on your water heater, it is crucial to turn off the power supply. Locate the circuit breaker or switch that controls the water heater and switch it off to ensure your safety.
2. Drain the water heater tank
To access the anode rod, you will need to drain the water heater tank. Attach a hose to the drain valve at the bottom of the tank and open it to allow the water to flow out. Make sure you have a suitable drainage area to avoid any water damage.
3. Locate the anode rod
The anode rod is typically located on top of the water heater tank. It may be covered by a cap or insulation. Remove any covers or insulation to expose the anode rod.
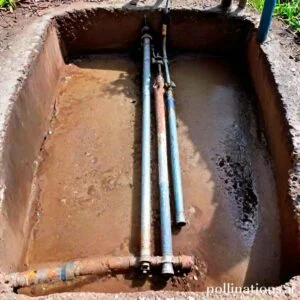
4. Remove the anode rod
Using a wrench or socket, carefully loosen and remove the anode rod from the water heater tank. Be cautious as the rod may be hot or corroded. Inspect the condition of the old rod to determine if it needs replacement.
5. Install the new anode rod
Insert the new anode rod into the water heater tank and tighten it securely. Make sure it is properly aligned and in direct contact with the water. This rod will help prevent corrosion inside the tank.
6. Refill the water heater tank
Close the drain valve and begin refilling the water heater tank. Check for any leaks or drips around the connections. Once the tank is full, you can turn the power supply back on and restore hot water to your home.
Tips for Successful DIY Anode Rod Replacement
Replacing anode rods in your water heater is an essential maintenance task that helps extend the lifespan of your appliance and prevent corrosion. Follow these tips to ensure a successful DIY anode rod replacement:
1. Choose the right type of anode rod
When selecting an anode rod for your water heater, consider the type of water you have. Different anode rods are designed for specific water conditions, such as hard water or water with high sulfur content. Consult your water heater’s manual or a plumbing professional to determine the best type of anode rod for your specific needs.
2. Use the right tools
Before starting the replacement process, gather the necessary tools. These may include a socket wrench, pipe wrench, Teflon tape, and a wire brush. Having the right tools on hand will make the replacement process easier and more efficient.
3. Follow the manufacturer’s instructions
Every water heater model is different, so it’s crucial to read and follow the manufacturer’s instructions for anode rod replacement. These instructions will outline the specific steps you need to take, including turning off the power and draining the tank. Following the instructions will ensure a safe and effective replacement process.
4. Perform regular maintenance
Replacing the anode rod is just one part of regular water heater maintenance. To keep your water heater functioning optimally, make sure to flush the tank periodically, check for leaks, and inspect the pressure relief valve. Regular maintenance will help prevent issues and extend the lifespan of your water heater.
| Tips for Successful DIY Anode Rod Replacement: |
|---|
| Choose the right type of anode rod |
| Use the right tools |
| Follow the manufacturer’s instructions |
| Perform regular maintenance |
Benefits of DIY Anode Rod Replacement
1. Cost savings
Replacing the anode rod in your water heater yourself can lead to significant cost savings. By skipping the expense of hiring a professional plumber, you can keep more money in your pocket. Additionally, purchasing the anode rod separately and installing it yourself is often cheaper than buying a whole new water heater.
2. Extended lifespan of the water heater
Regularly replacing the anode rod in your water heater can greatly extend its lifespan. The anode rod is designed to attract corrosive elements in the water, protecting the inner lining of the tank. Over time, the anode rod deteriorates and should be replaced. By doing this yourself, you ensure that your water heater continues to function optimally and lasts for years to come.
3. Improved water quality
Anode rods play a crucial role in maintaining water quality. By removing corrosive elements, they prevent the buildup of sediment and rust in the tank. This not only prolongs the life of your water heater but also ensures that the water flowing through your taps is clean and free from impurities. By taking the DIY route, you have control over the quality of the anode rod you choose, further enhancing the water quality in your home.
4. Peace of mind
Knowing that you have taken the necessary steps to maintain your water heater can bring you peace of mind. By replacing the anode rod yourself, you have a sense of control and confidence in the maintenance process. You can rest easy knowing that you have contributed to the longevity and efficiency of your water heater.
Bottom Line
Replacing the anode rod in your heat pump water heater is a simple DIY task that can save you money in the long run. By doing it yourself, you can avoid costly service calls and extend the life of your water heater. Make sure to follow the manufacturer’s instructions and use the correct type of anode rod for your specific model. Regular maintenance of your water heater can also help prevent corrosion and prolong its lifespan. With a little bit of effort, you can keep your heat pump water heater running efficiently and effectively for years to come.
Remember, if you’re not comfortable performing this task yourself, it’s always best to hire a professional. But for those who are up for the challenge, replacing the anode rod can be a rewarding and cost-effective DIY project. So, don’t wait until it’s too late – take action now to protect your investment and ensure your water heater is working at its best.
Read More:
1. Diy Anode Rod Replacement Impact On Warranty
2. Anode Rod Condition And Its Effect On Pilot Light