In this DIY guide, we will investigate anode rod replacement for busy households. Anode rods play a crucial role in preventing corrosion in your water heater, ensuring its longevity and efficiency.
We will discuss the importance of regular replacement, the materials and tools needed, and provide step-by-step instructions for a hassle-free process. By complying with this guide, you can save time and money by tackling this essential maintenance task on your own.
So let’s get started and ensure your water heater continues to provide reliable hot water for your busy household.
Grasping Anode Rods
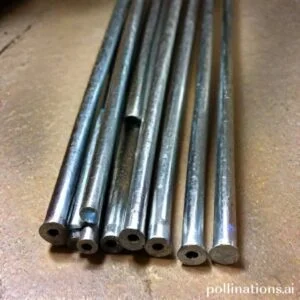
1. Types of Anode Rods
Anode rods play a crucial role in protecting your water heater from corrosion. There are three main types of anode rods commonly used:
| Magnesium Anode Rods | … |
| Aluminum Anode Rods | … |
| Zinc Anode Rods | … |
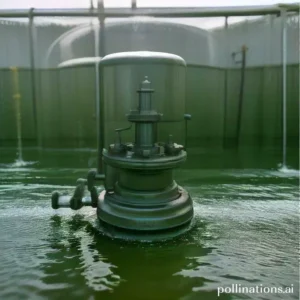
2. How Anode Rods Work
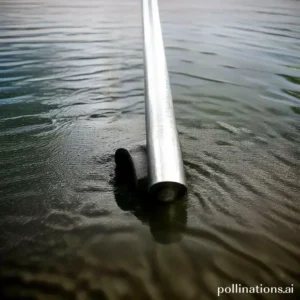
Anode rods are sacrificial rods that attract corrosive elements in the water, preventing them from attacking the metal tank of your water heater. The anode rod corrodes over time, sacrificing itself to protect your water heater from rust and corrosion.
When the tank is filled with water, the anode rod creates an electrochemical reaction where it oxidizes instead of the tank. This process extends the lifespan of your water heater and ensures its optimal performance.
3. Signs of Anode Rod Replacement
Over time, anode rods deteriorate and need to be replaced. Here are some signs that indicate your anode rod may need replacement:
- Visible Corrosion: If you notice visible corrosion on your anode rod, it’s a clear indication that it has been protecting your water heater and needs replacement.
- Rusty Water: If you notice rusty water coming out of your faucets, it could be a sign that your anode rod is no longer effective, and the tank is starting to corrode.
- Decreased Hot Water: If your water heater is not providing enough hot water as it used to, it could be due to a worn-out anode rod.
Regular inspection and timely replacement of anode rods are essential to maintain the longevity and efficiency of your water heater.
Tools and Materials Needed
As for anode rod replacement, having the right tools and materials is essential. In this section, we will discuss the key items you will need to successfully replace your anode rod.
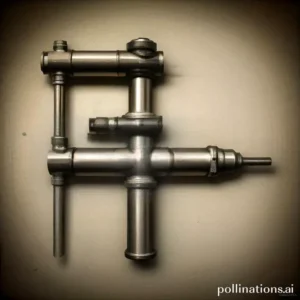
1. Tools
Before starting the replacement process, make sure you have the following tools:
- Adjustable wrench: This tool will help you loosen and tighten the anode rod.
- Teflon tape: Use this tape to create a tight seal when installing the new anode rod.
- Ratchet wrench: A ratchet wrench will make it easier to remove the old anode rod.
- Plumber’s tape: Apply plumber’s tape to the threads of the anode rod for a secure fit.
- Hacksaw: If your anode rod is too long, you may need to cut it down to size with a hacksaw.
- Safety gloves and goggles: Protect yourself from any potential injuries during the replacement process.
2. Materials
In addition to the tools mentioned above, you will also need the following materials:
- Anode rod: Purchase a new anode rod that is compatible with your water heater.
- Teflon tape: This tape will ensure a tight seal between the anode rod and the water heater.
- Plumber’s tape: Apply plumber’s tape to the threads of the anode rod to prevent leaks.
- Pipe cleaner: Use a pipe cleaner to clean any debris or sediment from the anode rod opening.
- Bucket or towels: Have a bucket or towels on hand to catch any water that may spill during the replacement process.
Now that you know the tools and materials needed for anode rod replacement, you can confidently proceed with the task. Remember to follow the manufacturer’s instructions and take all necessary safety precautions. With the right tools and materials, you can ensure the longevity and efficiency of your water heater.
Step-by-Step Guide to Anode Rod Replacement
1. How do you prepare for anode rod replacement?
To ensure a successful anode rod replacement, proper preparation is key. Follow these steps:
- Gather the necessary tools: Before you begin, make sure you have the required tools handy. These may include a wrench, Teflon tape, and a bucket.
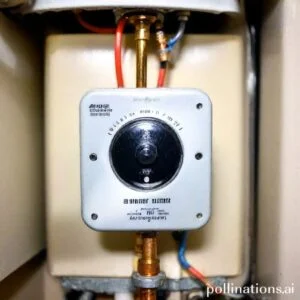
- Turn off the power supply: Before starting any work, turn off the power supply to your water heater. This will prevent any accidents or electrical shocks.
- Drain the water heater: Attach a hose to the drain valve of the water heater and place the other end in a suitable drainage area. Open the valve to drain the water heater completely.
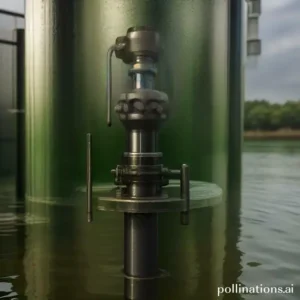
2. How do you remove the old anode rod?
Removing the old anode rod is a crucial step in the replacement process. Follow these instructions:
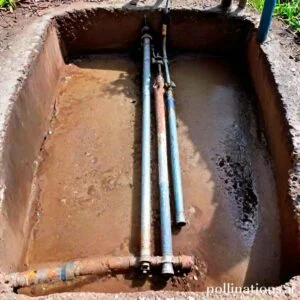
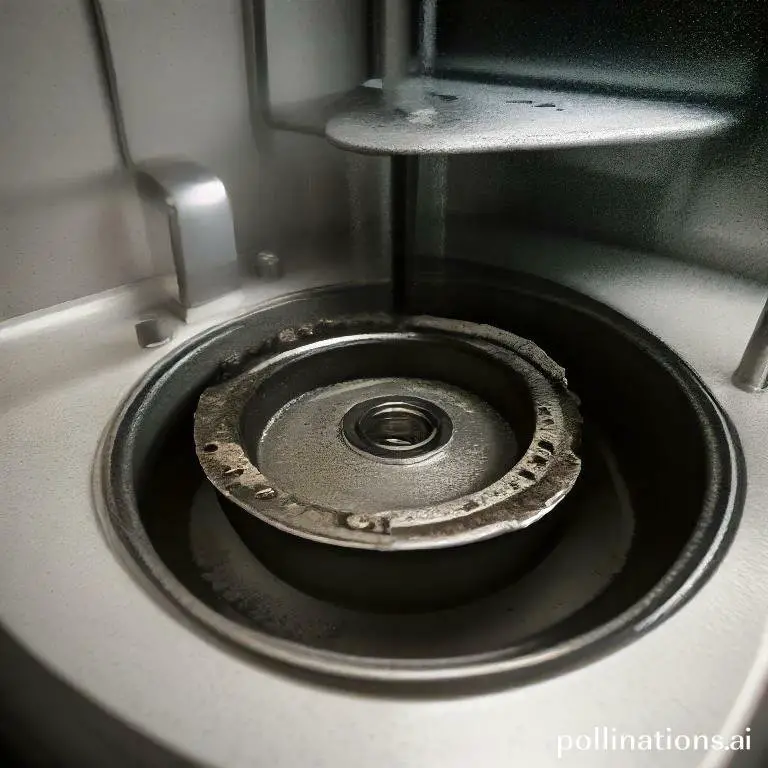
- Locate the anode rod: The anode rod is usually located on top of the water heater. It may be covered by a cap or plate that needs to be removed.
- Use a wrench: Once you have accessed the anode rod, use a wrench to loosen and remove it. Turn it counterclockwise until it comes loose.
- Inspect the old anode rod: Take a moment to inspect the old anode rod for signs of corrosion or deterioration. If it is heavily corroded, it’s a good indication that it needed to be replaced.
3. How do you install the new anode rod?
Installing a new anode rod is a straightforward process. Follow these steps:
- Apply Teflon tape: Wrap Teflon tape around the threads of the new anode rod. This will help create a tight seal and prevent leaks.
- Insert the new anode rod: Carefully insert the new anode rod into the water heater and turn it clockwise to tighten it. Use a wrench to ensure it is securely in place.
- Replace the cap or plate: If there was a cap or plate covering the anode rod, replace it to protect the newly installed rod.
4. How do you check if the new anode rod is properly installed?
After installing the new anode rod, it’s important to verify that it is properly installed. Here’s how:
- Turn on the power supply: Once you have completed the installation, turn on the power supply to the water heater.
- Check for leaks: Inspect the area around the anode rod for any signs of water leakage. If you notice any leaks, tighten the rod further or seek professional assistance.
- Monitor performance: Keep an eye on the performance of your water heater. If you notice improved efficiency and reduced corrosion, it’s a good indication that the new anode rod is functioning properly.

Tips and Tricks for Successful Anode Rod Replacement
In this section, we will discuss essential tips and tricks to ensure a successful anode rod replacement. By maintaining these guidelines, you can avoid common mistakes, prolong the lifespan of your anode rod, and maintain the efficiency of your water heater.
1. Common Mistakes to Avoid During Anode Rod Replacement
When replacing your anode rod, it is crucial to steer clear of certain common mistakes that can hinder the effectiveness of the process. Here are some key points to remember:
- Using the wrong type of anode rod: Ensure that you select the appropriate anode rod material based on your water heater’s specifications. This will prevent corrosion and maximize protection.
- Skipping the flushing step: Before installing a new anode rod, thoroughly flush out any sediment or debris from your water heater. This will optimize the rod’s performance and prevent clogging.
- Over-tightening or under-tightening: Strike the right balance when tightening the anode rod. Over-tightening can cause damage, during under-tightening can lead to leaks.
- Ignoring safety precautions: Always turn off the power supply and shut off the water before starting the replacement process. This will prevent accidents and ensure your safety.
2. Frequency of Anode Rod Inspection
To maintain the longevity of your water heater, it is essential to regularly check your anode rod. We recommend inspecting it at least once a year. Notwithstanding, the frequency may vary depending on the quality of your water and the manufacturer’s recommendations. By keeping an eye on your anode rod, you can identify signs of corrosion and take timely action.
3. Extending the Lifespan of Your Anode Rod
Proper care and maintenance can significantly extend the lifespan of your anode rod. Here are some effective strategies:
- Regular flushing: Flushing your water heater annually will remove sediment and mineral buildup, reducing strain on the anode rod.
- Water softening: If your water is hard, consider installing a water softener. Soft water contains fewer minerals, reducing the workload on the anode rod.
- Monitoring sacrificial anode consumption: Keep an eye on the condition of the anode rod. Once it is significantly depleted, replace it promptly to prevent corrosion of the water heater tank.

Troubleshooting Anode Rod Replacement
The anode rod is a crucial component of your water heater, as it helps prevent corrosion by sacrificing itself. Nonetheless, there may be instances when you encounter issues with the anode rod replacement process. In this section, we will address common problems that you may face and provide solutions to ensure a successful replacement.
1. Anode Rod Won’t Budge
If you find that the anode rod is stuck and won’t loosen, it can be frustrating. Albeit, there are a few steps you can take to resolve this issue:
- Apply penetrating oil: Spray a generous amount of penetrating oil on the threaded portion of the anode rod and let it sit for a few hours. This will help loosen any corrosion or rust that may be causing the rod to stick.
- Use a breaker bar: Attach a breaker bar or a long-handled wrench to the anode rod for additional leverage. Apply steady pressure in a counterclockwise direction to try and loosen the rod.
- Seek professional help: If you have tried the above steps and the anode rod still won’t budge, it may be best to consult a professional plumber who has the necessary tools and expertise to safely remove it.
2. Anode Rod is Too Short
When replacing the anode rod, it is essential to ensure that the new rod is the correct length. If you find that the replacement rod is too short, follow these steps:
- Measure the length: Use a measuring tape to determine the length of the existing anode rod. Note down the measurement to ensure you purchase a replacement of the same size.
- Consult the manufacturer: Reach out to the water heater manufacturer or refer to the owner’s manual to determine the recommended length for the anode rod. This will help you find the appropriate replacement.
- Consider an extension: If the replacement anode rod is slightly shorter, you may be able to use an extension nipple to bridge the gap. Consult a professional plumber to ensure proper installation.
3. Anode Rod is Too Long
Similarly, if the replacement anode rod is too long, you will need to take the following steps:
- Measure the available space: Determine the maximum length that can fit within your water heater. Consider any obstructions or limitations that may affect the rod’s length.
- Trim the rod: If the replacement anode rod is longer than the available space, you can use a hacksaw or a pipe cutter to trim it to the appropriate length. Ensure that the cut is clean and smooth.
- Smooth the edges: After trimming the rod, use sandpaper or a file to smooth any rough edges or burrs. This will prevent damage to the water heater tank during installation.
| Common Problems | Solutions |
|---|---|
| Anode rod won’t budge | Apply penetrating oil, use a breaker bar, seek professional help |
| Anode rod is too short | Measure length, consult manufacturer, consider an extension |
| Anode rod is too long | Measure available space, trim the rod, smooth the edges |
Bottom Line
Replacing an anode rod is an essential task to ensure the longevity of your water heater. In the course of it may seem daunting, a DIY replacement can save you time and money. With the right tools and a little bit of patience, busy households can easily replace their anode rod in just a few hours. Remember to turn off the power and water supply before starting the process and to follow the manufacturer’s instructions carefully. Regular maintenance of your water heater can prevent costly repairs and replacements in the future. By taking the time to replace your anode rod, you can ensure that your water heater will continue to provide hot water for years to come.
Read More:
1. Compatibility Of Aluminum Anode Rod With Hard Water
2. Anode Rod Maintenance Tips For Tankless Water Heaters